Setting Up Your xTiles Account
We’re glad to welcome you to xTiles, your personal hub for streamlined organization and clear collaboration. Let’s dive right in and get your account set up, so you can start experiencing the best time management and productivity right now.
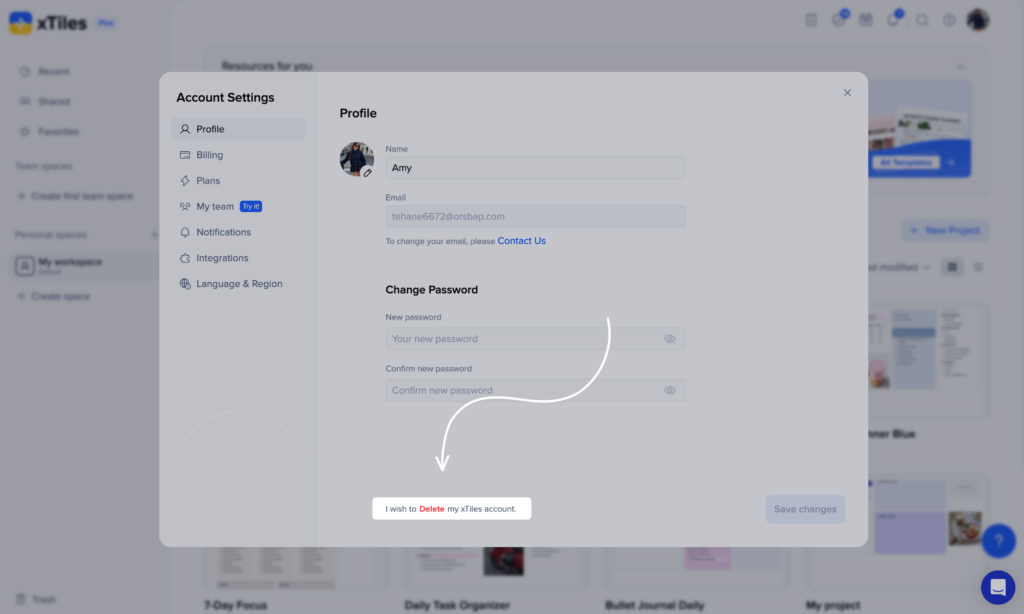
Profile
In this section, you can change your xTiles Profile name and password to your account if needed. You can also change your email address by contacting our support team at [email protected].
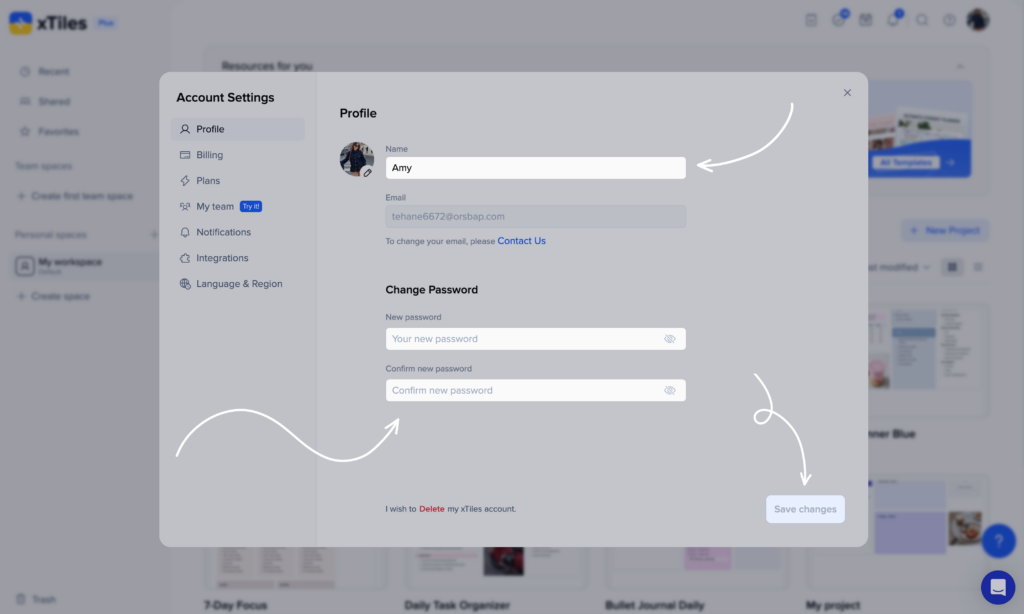
To change your name:
- Type your name into the entry field.
- Click “Save changes” at the bottom of the window.
To change your password:
- Type your new password into the entry field.
- Repeat your password for validation.
- Click “Save changes” at the bottom of the window.
Language & Region Settings
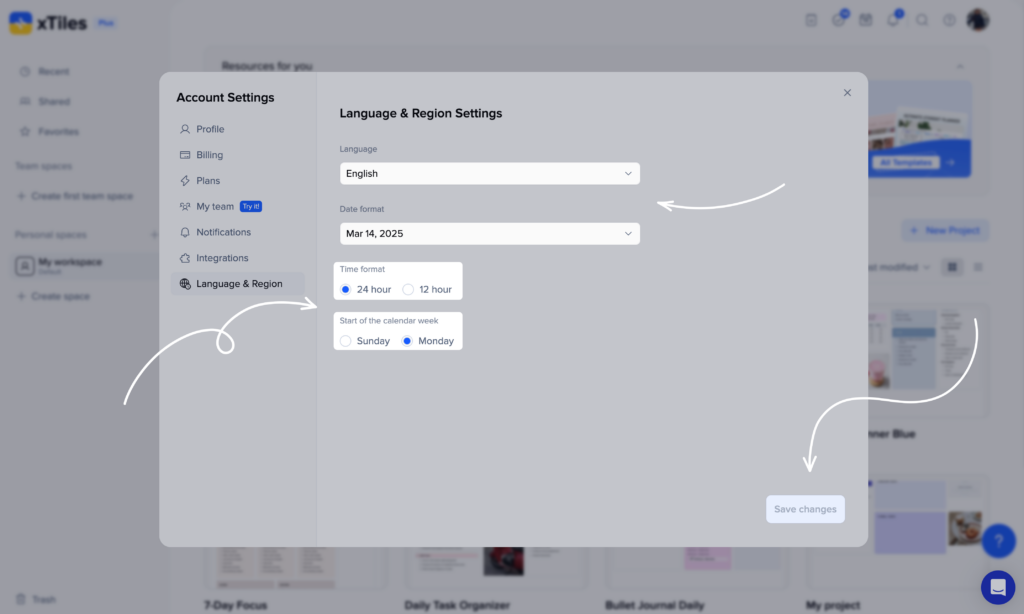
Language
To ensure seamless use, xTiles allows you to select your preferred language. This will change the interface and text within the application. Follow the steps below to make the change.
To set up an account language:
- Click on your Profile icon in the right upper corner.
- Choose the “Language & Region” section from the dropdown.
- Select a preferable language from the dropdown.
- Click “Save changes” at the bottom of the window.
Set Up a Date Format
xTiles offers different date formats you can choose from in your account settings. Select from numeric (12/03/25) or written (Wed/Mar 12/2025) formats to create your most convenient personal space in xTiles.
To set up a date format:
- Click on your Profile icon in the right upper corner.
- Choose the “Language & Region” section from the dropdown.
- Choose the most convenient date format for your everyday work.
- Click “Save changes” at the bottom of the window.
Set Up a Time Format
You can also choose from two types of time formats within xTiles: The 24-hour time format displays time using hours from 0-23 (like 14:30, etc), and the 12-hour format uses AM/PM indicators (like 2:30 PM).
To set up a time format:
- Click on your Profile icon in the right upper corner.
- Choose the “Language & Region” section from the dropdown.
- Choose the appropriate time format for your xTiles account.
- Click “Save changes” at the bottom of the window.
Start the Week
Start your week when you want to with xTiles! Choose from starting your week on Monday or Sunday — it’s all just up to you!
To set up a start of the week:
- Click on your Profile icon in the right upper corner.
- Choose the “Language & Region” section from the dropdown.
- Choose the start of the calendar week.
- Click “Save changes” at the bottom of the window.
Notifications
xTiles uses notifications to keep users updated with the latest changes, ensuring they won’t miss a thing. Here, we’ll learn how to manage the notifications on different devices.
To enable notifications within the xTiles app:
- Click on your Profile icon in the right upper corner.
- Choose the “Profile” section from the dropdown.
- Go to the “Notification” section in the left bar of the window.
- Enable the xTiles notifications. Now, nothing gets past you.
Still, sometimes you need to grant permissions from your web browser or operating system, so we can send you notifications and ensure you won’t miss a beat.
If you’re using the browser Chrome or Firefox:
- Go to Settings ➡ Privacy and security.
- Search for Site settings or Notifications settings.
- Make sure https://xTiles/app/ is added to the Allow section.
🚨Note: to receive notifications in your browser, the operating system notifications must also be enabled.
If you’re using the browser Safari:
- Open Safari and navigate to the https://xTiles/app/.
- When the website attempts to send a notification, Safari will display a prompt asking for your permission.
- Click “Allow” to enable notifications from xTiles.
If you’re using iOS or Windows desktop apps:
Please note that notifications are currently not supported on desktop apps
If you’re using an iOS or Android app:
- Go to Settings ➡ Notifications.
- Find xTiles in the list of applications and customize notification settings.
Delete Your xTiles Account
We understand that circumstances change. If you wish to delete your xTiles account, we’ll miss you but we hope to see you back in the future.
🚨Note: Users should note that xTiles deletes all user data once accounts are deleted. This makes data recovery and restoration impossible.
To permanently delete your account:
- Click on your Profile icon in the right upper corner.
- Choose the “Profile” section from the dropdown.
- At the very bottom of the window, press “I wish to Delete my xTiles account”.
- Approve the account deletion by entering your linked email address.
Streamline your workflow and share your xTiles projects with ease. Learn all about exporting and importing content in our practical guide: Export & Import Content in xTiles ➡️
Join Our Community and Stay Tuned for Product Updates
Want to stay on top of things? Be the first to know about the latest xTiles updates with our changelog page. Implement the top-notch tools to improve your processes while your competitors lag behind. You are also more than welcome to join the xTiles community on Slack and Discord, while also visiting our YouTube channel and xTiles blog to explore all the possibilities for your professional and personal growth.