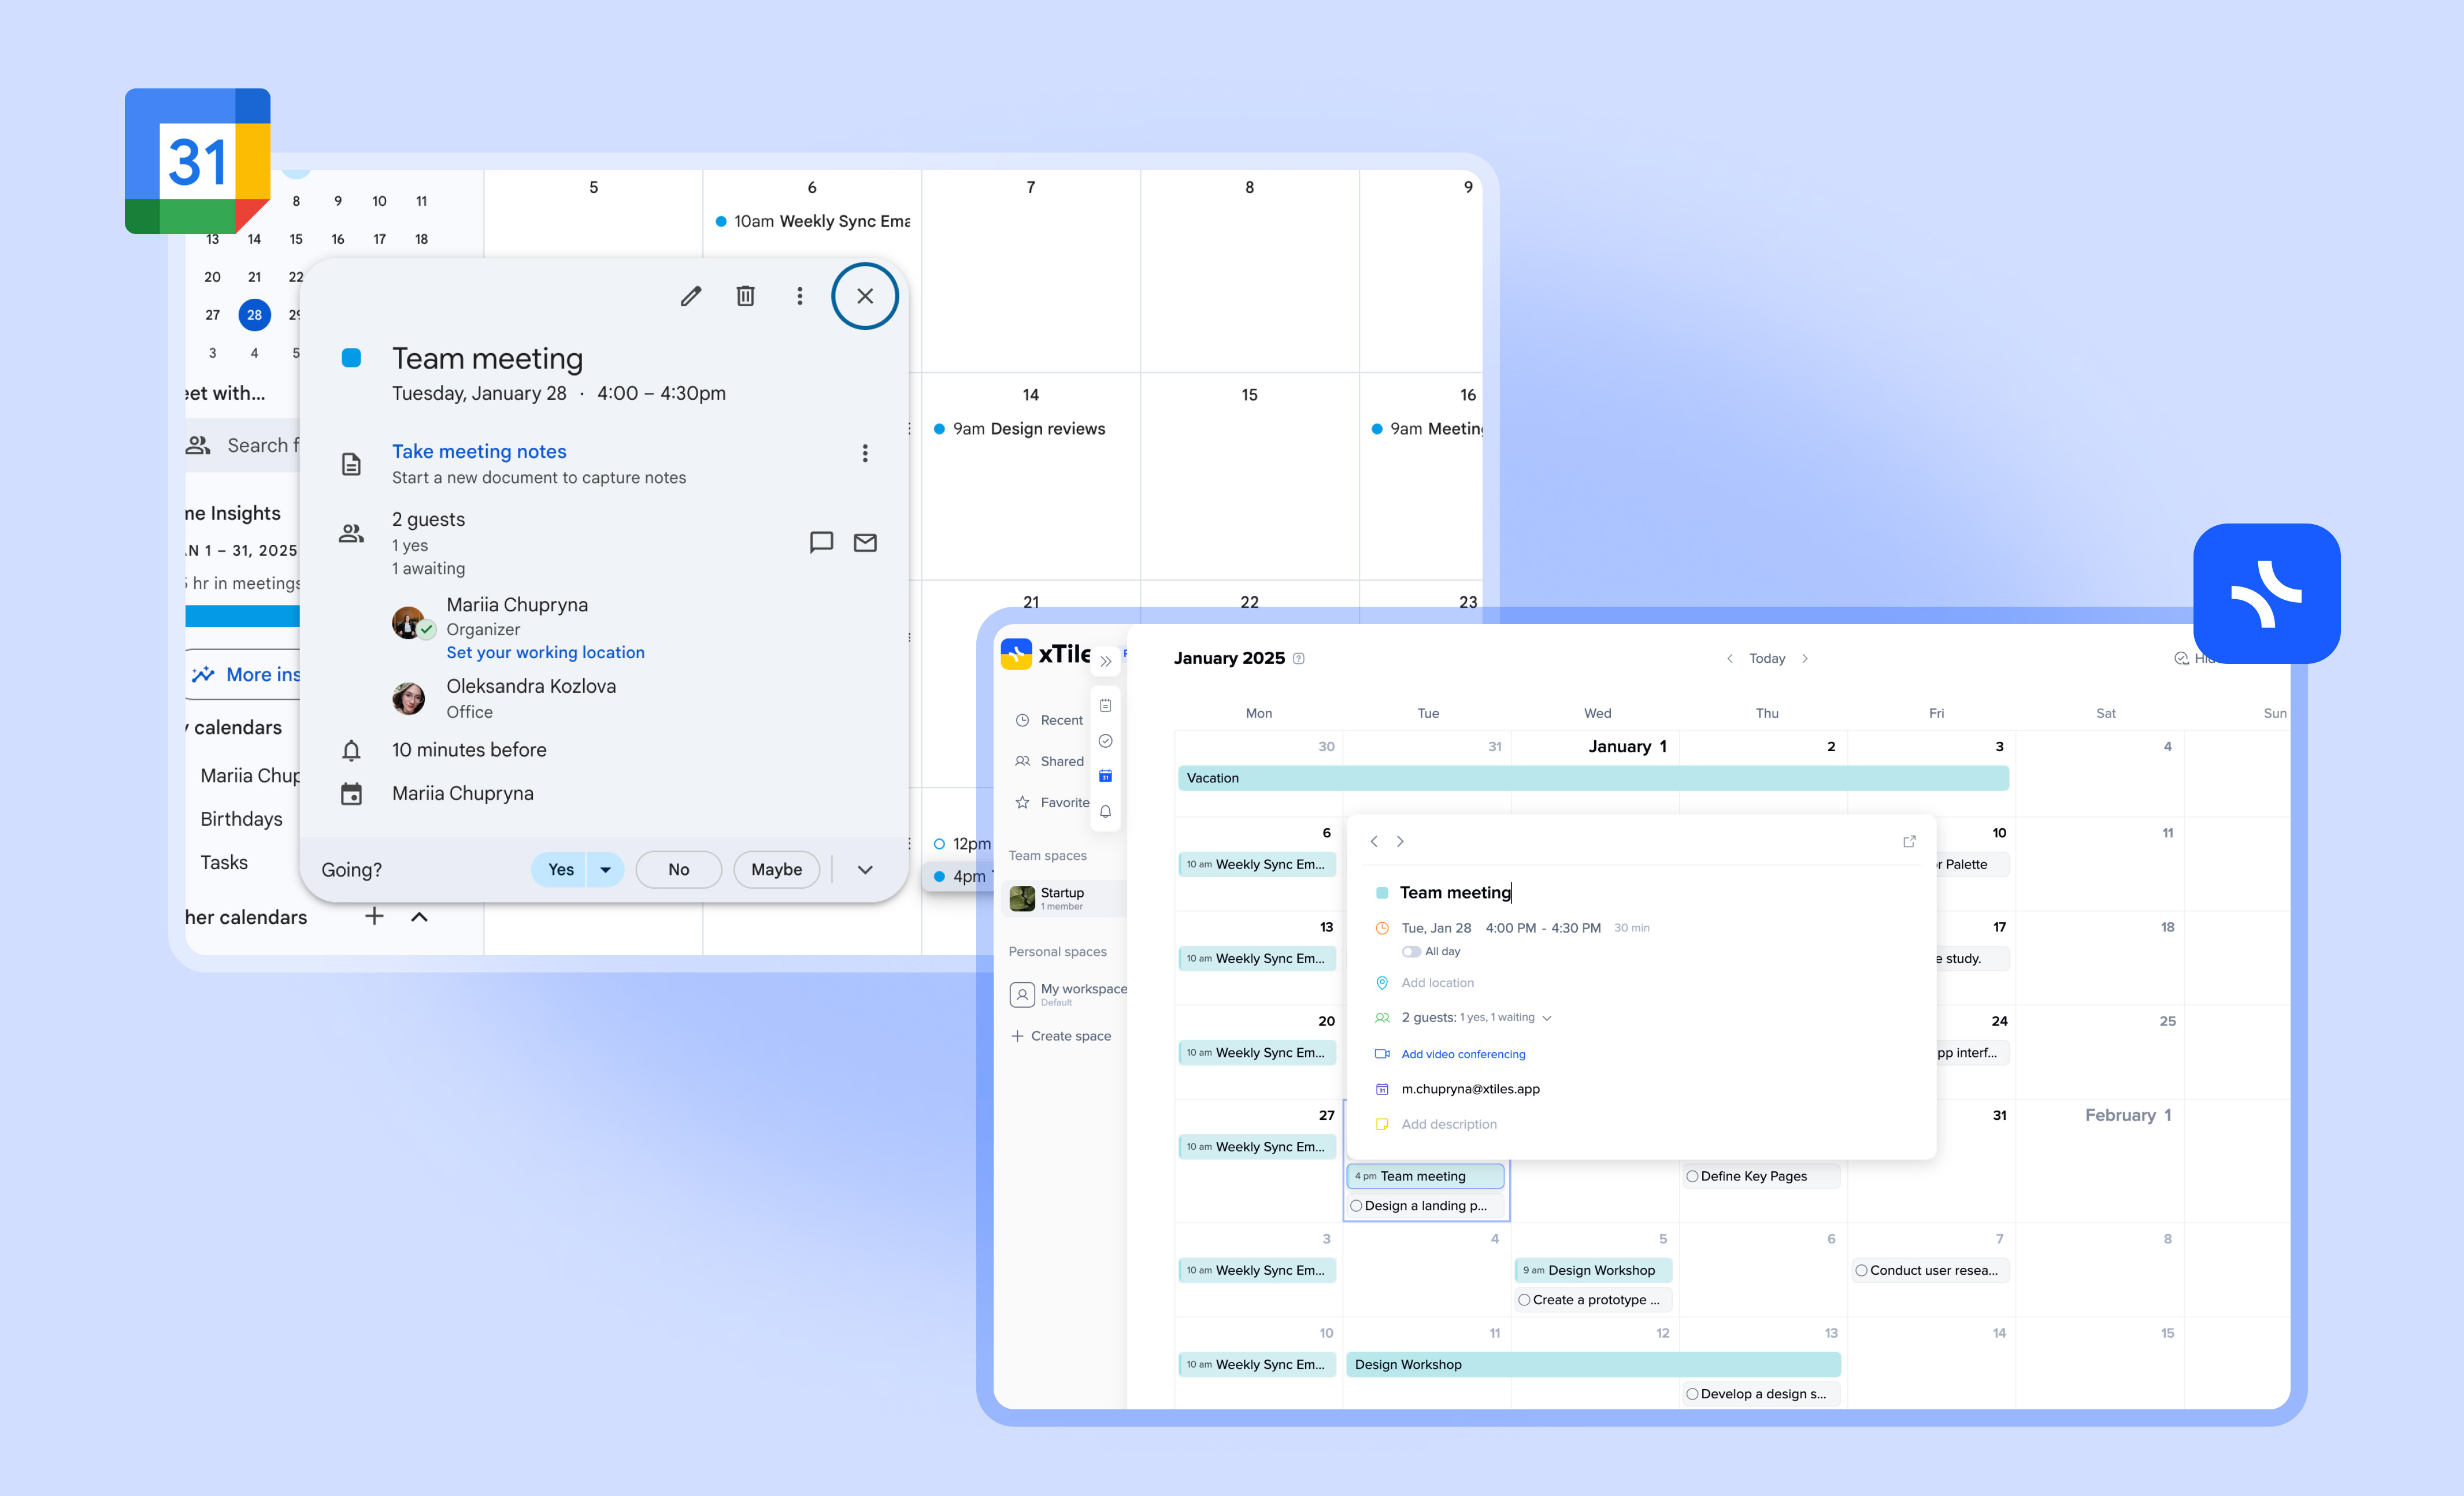
Say goodbye to app-switching chaos. xTiles merges your Google Calendar events into a single workspace which eliminates the confusion of jumping between different apps. View all your calendar events and tasks in a unified space, allowing for smoother day-to-day planning. Use automatic two-way sync for convenience while enjoying quick meeting access plus centralized task management features. Whether managing team events or coordinating personal tasks, you can create, edit, and track everything without leaving the xTiles workspace. Simplify your workflow and optimize your time — all within xTiles.
Benefits of Using xTiles & Google Calendar Integration
Integration with Google Calendar delivers significant advantages:
-
Unified View: Seamlessly view all your Google Calendar events and xTiles tasks in a single, convenient location.
-
Direct Calendar Management: Effortlessly organize events without leaving xTiles. View, edit, and create calendar entries directly within the xTiles calendar, simplifying your day, week, and month planning.
-
Simplified Meeting Management: Adding teammates or declining meeting invitations is now streamlined and seamless.
-
Instant Meeting Access: Quickly join video calls or meetings with a single click on the relevant event, ensuring you’re always on time.
This is how users can improve their time management, streamline personal and work planning, improve their focus, enhance work communication within the team, and get many other benefits.
How to Launch Google Calendar Integration?
Two-way Google Calendar integration is available with an xTiles Plus subscription, while users with a Starter Plan can use the one-way feature.
You can initiate your Google Calendar integration in three ways: through your Personal Account Settings, via the Google Calendar Integration Button in your Calendar, or by clicking the Connect Button in your Tasks panel.
Connecting Google Calendar integration to your xTiles account is easy and works the same across all entry points. So here’s the overview of how to connect an integration via Personal Account Settings:
- Click on your xTiles account icon.
- Select an Integrations section from the dropdown.
- Click “Connect Google Calendar”.
- Choose the desired Google Account in the pop-up window.
- Grant all the permissions.
- Your Google Calendar is now integrated.
You can also add more Google accounts to the integration. To do this, go to your xTiles account → Integrations → press the “Add Google Calendar” button, and follow the same further actions we’ve mentioned above.
How to Create an Event?
To create an event in the xTiles Calendar you need to:
- Hover over a date.
- Click the “+” button.
- Choose the “Event” option from the dropdown.
- Give your event a title.
- Set the event’s time.
- Add location if needed.
- Invite guests to your meeting.
- Select the video conferencing option to generate an invitation link directly within the event card.
- Choose the account you want to connect an event to.
- Misclick the event to save changes.
After that, this event will appear automatically in your Google Calendar.
How to Edit an Event?
To edit an event:
- Open the existing event.
- Change all the areas that need to be adjusted.
- Close the event and have all changes automatically updated in the Google Calendar.
How to Delete an Event?
To delete an event:
- Hover over the existing event.
- Choose the three-dot button on the right side of the block.
- Select “Delete” from the dropdown.
How to Revoke Google Calendar Integration?
To disconnect the Google Calendar integration:
- Go to your xTiles account.
- Proceed to the Integrations section from the dropdown menu.
- At the bottom of the card, find the option to remove the integration and click “Revoke”.
How to Adjust Google Calendar Display
To set which Google Calendars you want to see in your xTiles Calendar, you have to:
- Go to your xTiles account.
- Select the Integrations section.
- From the list of connected email addresses, switch on/off the required one.
- You can also hide all the events by pressing “Hide all”.
Where Can You See Your Sync Events in xTiles?
If you’re wondering where your Google Calendar events will automatically appear in your xTiles account, here are the places where you can find them:
-
Calendar;
-
Today’s Section in the Task panel;
-
Calendar View of Collection;
-
Task screen in Mobile Application.
Google Calendar Integration Availability According to the xTiles Plan
Here is our short yet comprehensive breakdown of which features are available in Free, Starter, and Plus Plans.
| Feature | Free Plan | Starter Plan | Plus Plan |
| Type of Integration | – | One-way | Two-way |
| View GC events | – | + | + |
| Create GC events | – | – | + |
| Edit GC events | – | – | + |
| Delete GC events | – | – | + |
| Guests management | – | – | + |
Join Our Community and Stay Tuned for Product Updates
Want to stay on top of things? Be the first to know about the latest xTiles updates with our changelog page. Implement the top-notch tools to improve your processes while your competitors lag behind. You are also more than welcome to join the xTiles community on Slack and Discord, while also visiting our YouTube channel and xTiles blog to explore all the possibilities for your professional and personal growth.