Project Dashboard
Project Canvas

Project Canvas Template
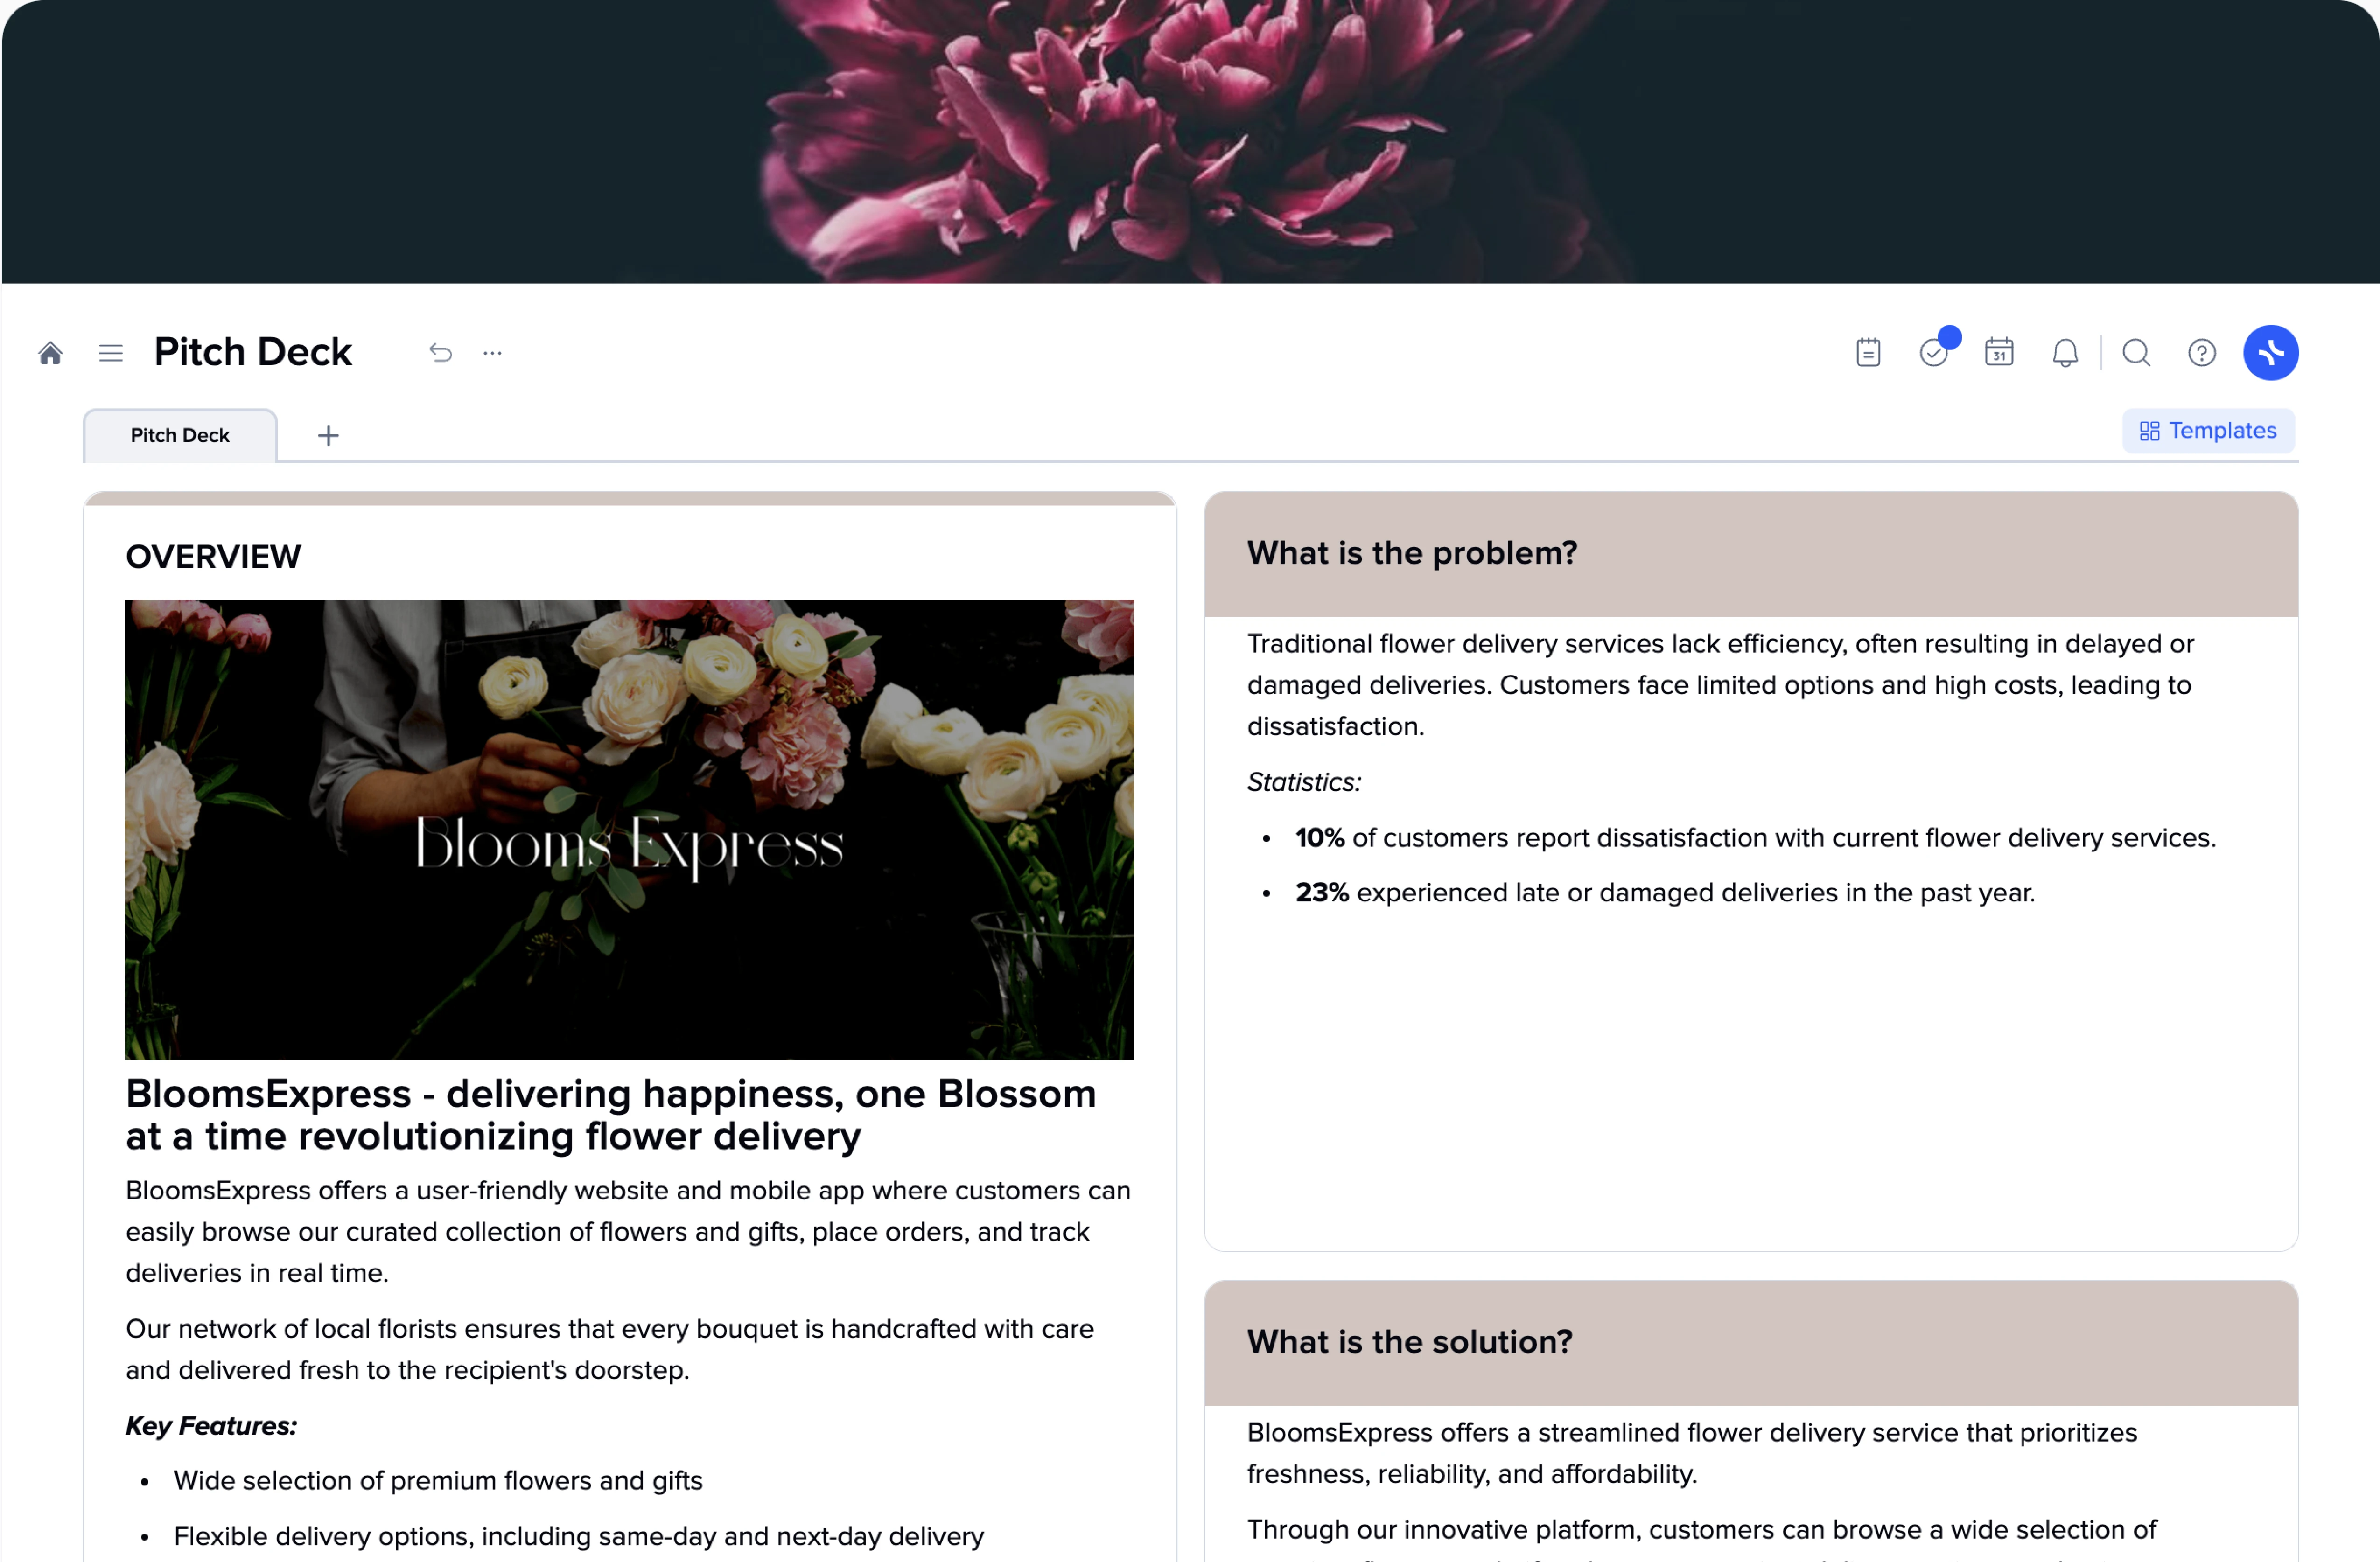
The project canvas is a valuable tool that enables teams to collaboratively define and convey the vision and strategy behind a project they are embarking on. This document also facilitates effective communication with clients, stakeholders, and everyone involved.
A project canvas consolidates various aspects of a project to become a specialized knowledge base, offering quick answers when uncertainties arise. It is to streamline the team’s efforts by providing structure, gathering information, and highlighting key points.
With a project canvas template, the time-consuming task of structuring and collecting information is significantly reduced. The template allows you to focus solely on inputting your data.
xTiles presents a readily available and free Project Canvas Template that can be easily shared with colleagues and anyone who needs to access it. Our template is designed to be flexible and adaptable to meet the specific needs of different projects, products, and teams.
A project canvas template: when to use it?
Typically, teams or individual creators use a project canvas template in the early stages of product development to help people involved, clients, and stakeholders to be on the same page and facilitate discussion around the project.
However, it can be beneficial to use the project canvas at various stages throughout the product development journey, from initial idea to launch and beyond. The xTiles Project Canvas Template was built upon the idea that the impulse to start may be stronger than a desire to make documentation.
The project canvas template serves multiple purposes:
- Idea generation:
When the bulb near your head has appeared, but you’re unsure about the direction or desired outcomes, the project canvas template helps you turn your thoughts into something that can be described with words or visual content or by combining these two, and then it helps effectively communicate your vision to others.
- Planning:
Once your idea is refined and well-defined, the planning stage begins, or at it least it should go next. This involves making numerous decisions and engaging in discussions, sometimes productive and sometimes useless, yet all of this is necessary to come up with a plan that will make your idea work.
The project canvas template provides a working plan that keeps the team aligned and motivated to deliver their best work.
- Alignment around a shared vision:
In product development, there are various stakeholders with different motivations, and there is a team of different people with various visions. However, it is crucial for everyone involved to be united around a shared vision. The canvas project management template ensures that everyone understands what they are working on and how they should be working to make the project successful.
- Task prioritization:
Effective prioritization is the secret behind successful and timely product delivery. Even though everyone knows that it is highly important to establish the workflow upon prioritizing tasks, not everyone follows this rule, which sometimes has consequences.
With the project canvas template, you can define the most important tasks, distinguish what is less important, and identify potential distractions that may seem important but divert focus from the product’s real goals and purpose.
- Communication:
Sharing and discussing the project canvas with your team enhances understanding and collaboration. Sometimes, words alone may not suffice to express ideas or concepts. The online nature of templates allows for creativity in communication, such as using visuals, memes, or even songs to convey the desired vibe and information.
How can you create a Project Canvas?
Creating a project canvas before you and/or your team embark on your journey is much simpler than dealing with the consequences of starting a project without a clearly defined and discussed idea. Additionally, when it only begins, you have less data to deal with, which means that if you add here a pre-designed template, it won’t take you much time to accomplish a document that will guide everyone involved during the whole project and help newcomers to jump in quicker.
We have a short guide to help you create your own document so you can begin your project as soon as possible and without fear that you will have a lot to sort out later.
The xTiles Project Canvas Template is highly flexible and can be adapted to suit the specific needs and features of your project or your vision for its destiny. You have the freedom to add or remove sections, add visual content, or embeds to express your intent better.
To create a project canvas for your project using the xTiles template, follow these simple steps:
- Start with determining the name of your product:
Decide on a name for your product that is memorable and possibly has a subtle connection to the problem it claims to resolve. The name plays an important role in creating a cohesive product.
Additionally, when something has a name, it feels more real and serious. This factor may be more important for a team and stakeholders at the early stages than for potential clients.
- Name everyone involved:
Create a list of all participants. That will help to understand who is responsible for the project’s development. If other teams have to interact with you regarding your project or a new team member needs a quick guide, they can find the information in your project canvas effortlessly.
- Then define the business goals:
What do you and your team need to achieve to have the right to call your project successful? Identify the key goals of your project, such as revenue growth, market share, or customer retention. If you already have a product roadmap, this step won’t take much time.
You may even establish key metrics that will help you measure whether you have achieved your goals or not. It’s important to ensure that the metrics are realistic to maintain motivation.
- Identify the target audience/users:
Determine who your product is intended for and who you aim to help or satisfy. Understanding the problem your product addresses is essential in defining your target customers. Ongoing research is necessary to stay updated with market trends and user behaviors.
Also, it’s important to be precise when determining your potential audience. Very wide, with no clear frames, conceptions might distract a team from delivering the needed product.
- Plan your next steps:
Outline the actions you will take to start implementing the ideas and goals. Remember that this section should naturally grow from the “Goals” section in order to be useful for the idea.
- Define what results you want to get:
Envision what your completed product will look like and what it will bring you in the long run. Review the data you have gathered and ensure that all points in your project canvas are aligned with each other to avoid confusion or ambiguity.
- Share your finished project canvas with everyone involved:
Once you have created the document, share it with all relevant stakeholders to gather feedback. It’s possible that after their review, you may need to refine or modify certain parts of the document. Once the document is validated, make sure to utilize it effectively and avoid letting it be forgotten or overlooked during the project development
Progress page
Productivity Planner
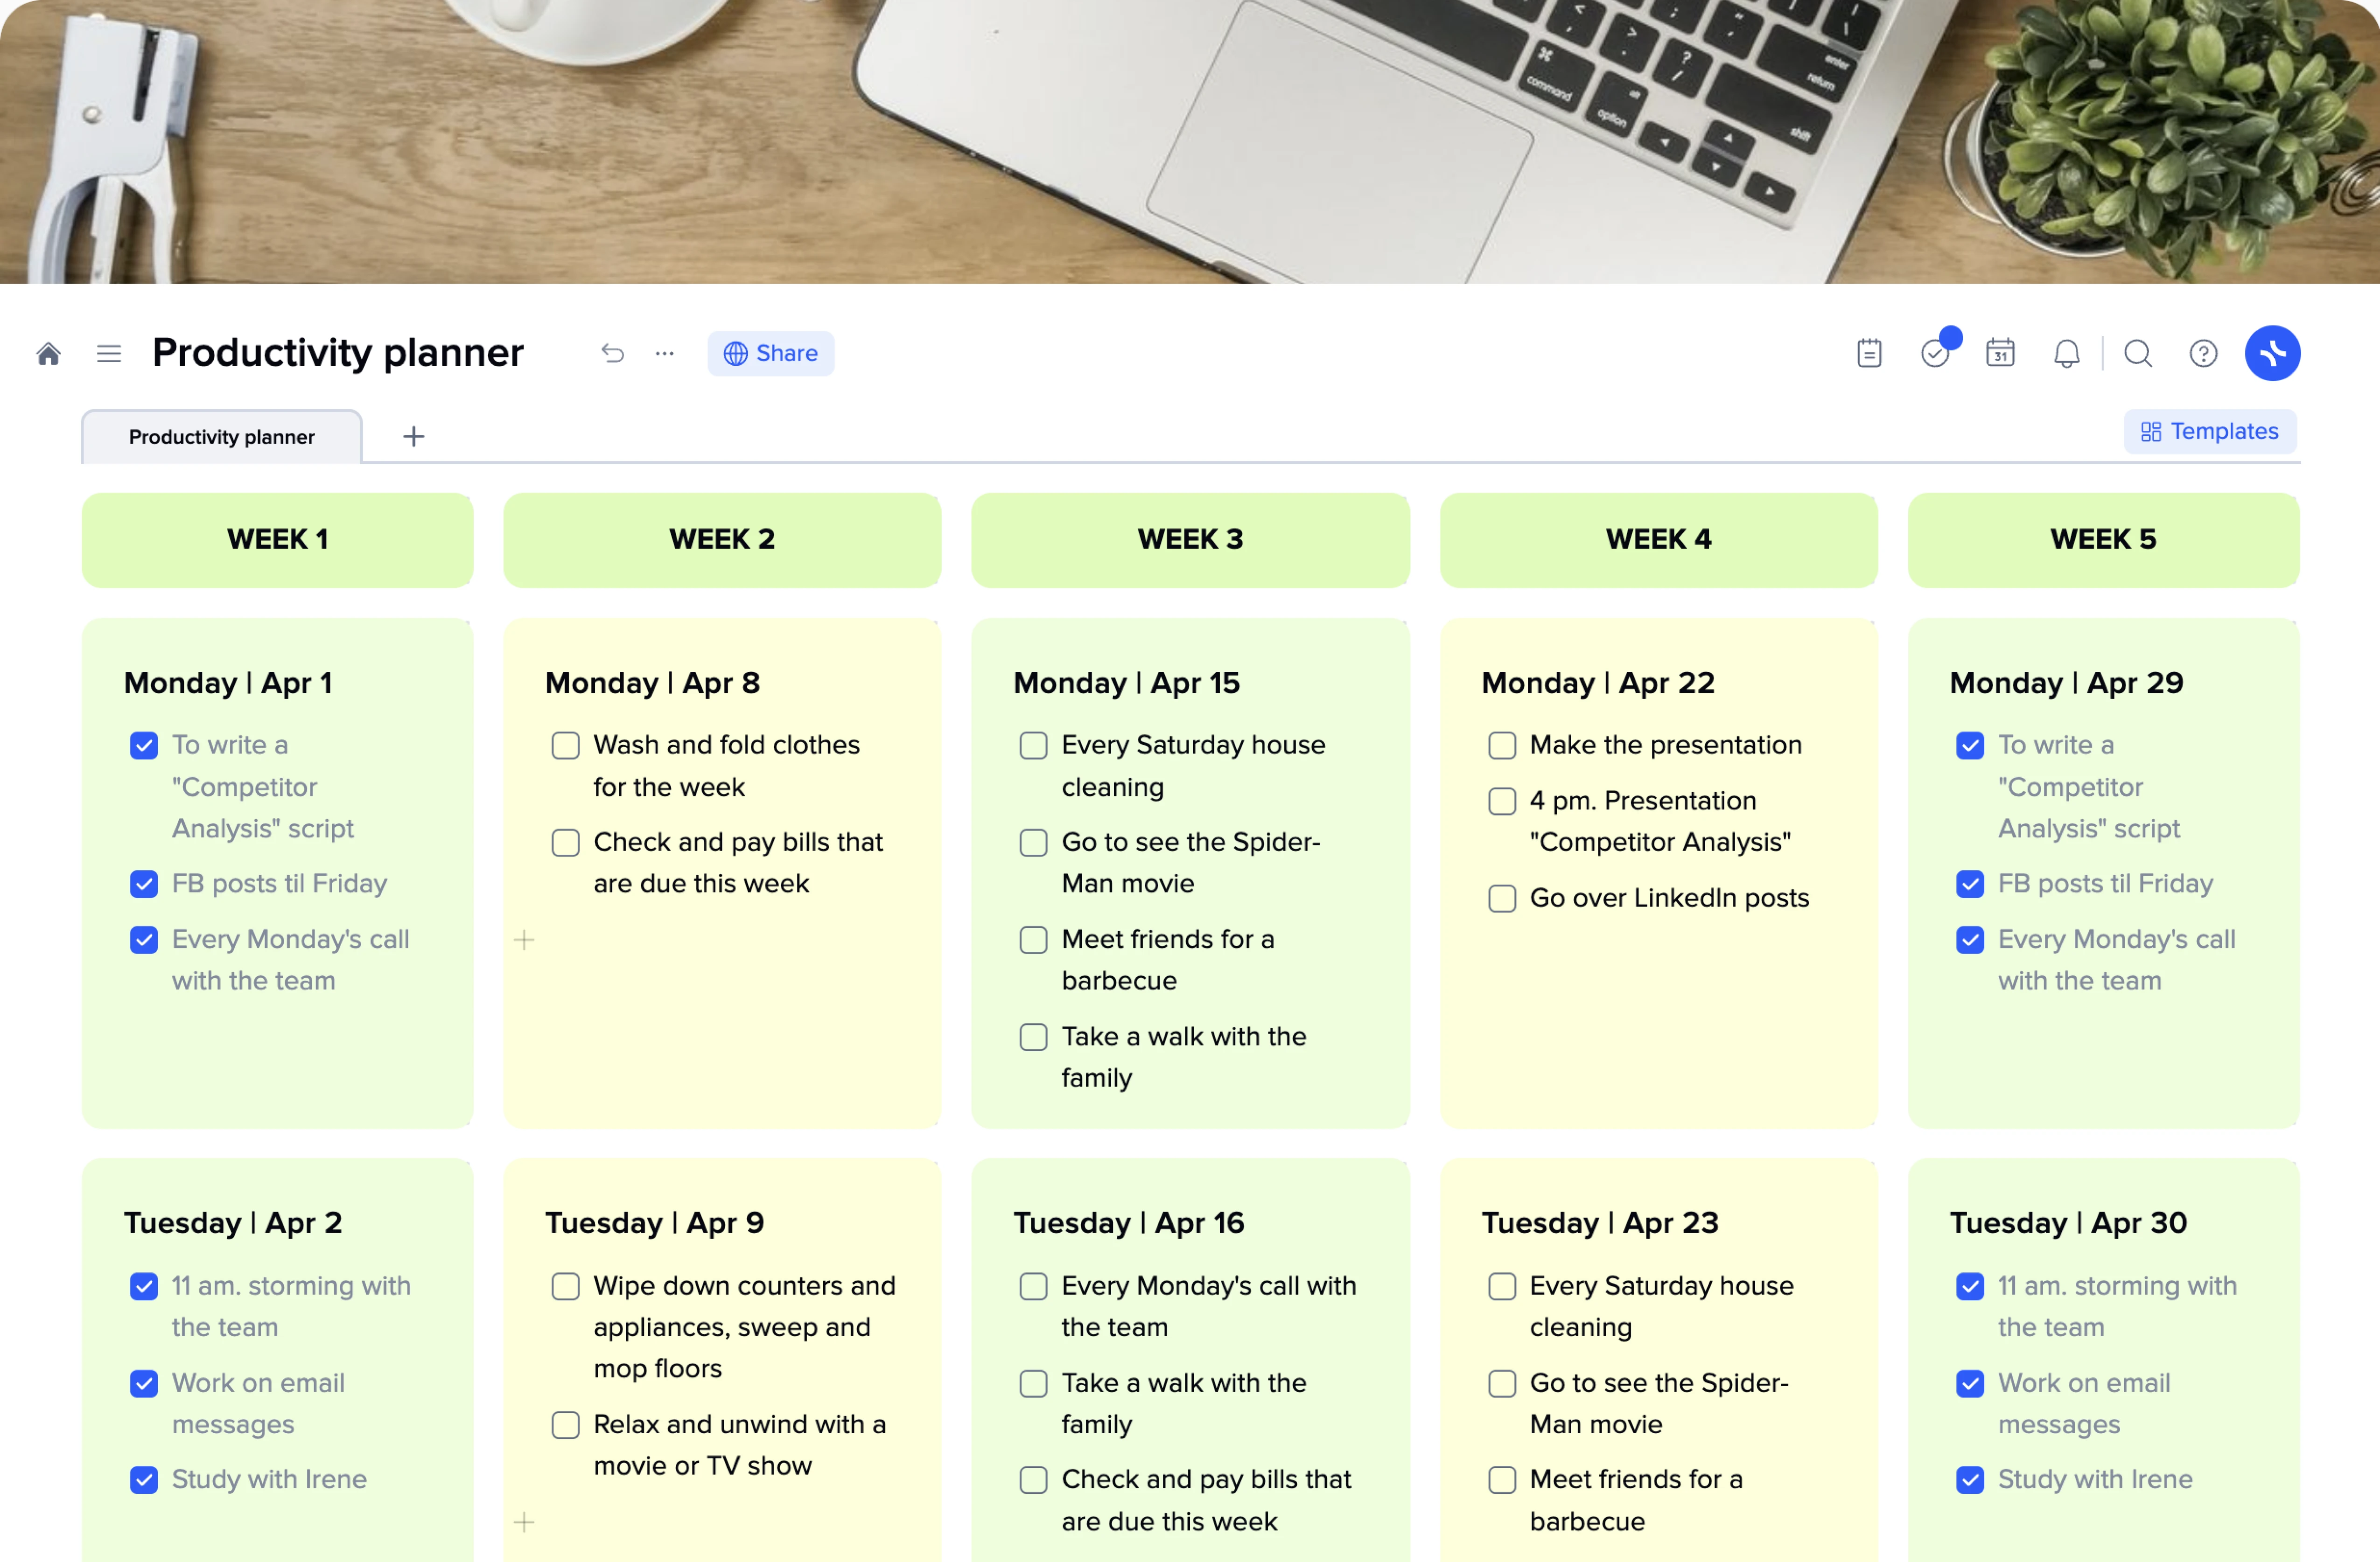
Productivity Planner Template
Is productivity something you can plan? Certainly! A productivity plan will help you schedule your work, tasks, meetings, and other activities and keep you motivated throughout a day, week, or month to keep moving forward and put ticks near every point of your plan.
Today, digital planners slowly but steadily win the fight, and analog ones become rudiments. Productivity planner apps and online productivity planners don’t take up space in your bag, are always with you wherever you go, and are easy to edit and customize. They ensure that important commitments are not overlooked in a more convenient way and allow people to stay informed about their colleagues’ plans and schedules without messaging or conversation.
xTiles Productivity Planner Template will help you stay productive without draining you out. Having a flexible and easy-to-customize productivity planner ensures you can adapt to any changes and unexpected challenges as quickly as possible.
What are Productivity Planners?
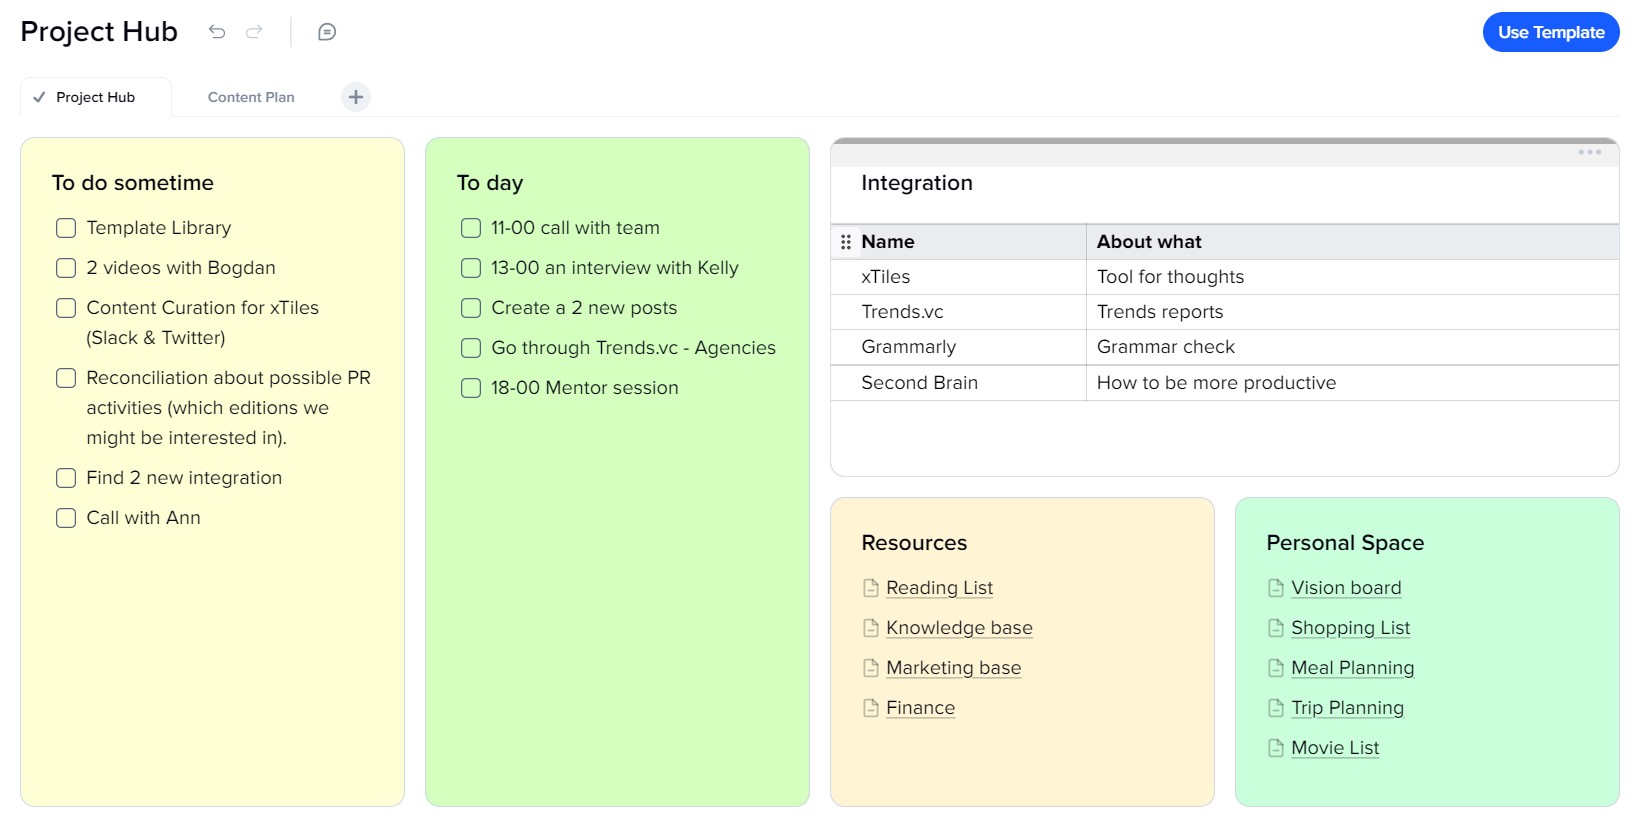
Productivity planners are tools or systems designed to help individuals manage their productivity and stay organized while feeling comfortable. They provide a structured way to track schedules, tasks, projects, and goals, allowing users to prioritize and manage their time effectively.
The productivity planner was invented by Gustav Grossmann in the 1930s. Grossmann claimed that following his instructions for using the planner could lead to increased productivity and a more “logical” lifestyle, and he wasn’t wrong, even though people still continue experimenting with planners and approaches.
Daily productivity planners became a huge thing in the 1980s when ring-binder files with calendars, contacts, task lists, and note pages gained popularity. Since then, the landscape has evolved, and numerous software tools and mobile applications now replicate the functionalities of traditional analog planners, keeping teams and projects synchronized.
In today’s fast-paced and uncertain times, productivity planners have gained significance as they offer a centralized location to consolidate various priorities and responsibilities. With the prevalence of remote work and dispersed teams, keeping track of project progress and meeting schedules can be challenging. Productivity planners provide a solution by enabling individuals and teams to stay organized, focused, and on track.
Why Should You Use a Productivity Planner?
Using a productivity planner, whether we speak about a digital one or an analog one, offers several benefits that may significantly improve your effectiveness and have an overall impact on your well-being. Some of them might not come overnight, which is perfectly okay because productivity planners are supposed to work in the long run.
Here are some compelling reasons to incorporate a productivity planner into your routine:
- Effective schedule management:
A productivity planner allows you to manage your usual schedule more efficiently. It also allows you to adapt to changes quickly and with less resistance. It shortens the amount of time and effort you have to invest in managing it on your own, relying solely on your memory. You can organize and prioritize your appointments, tasks, and deadlines, ensuring you won’t forget any of them.
By having a clear overview of your commitments for the following week or month, you can optimize your time and use each day better.
- Increased Productivity:
A planner helps you become more productive in performing your usual tasks by providing structure and accountability. And when you manage your everyday tasks better, you get extra space for something you’ve been thinking or dreaming about for a long time. You can stay focused and motivated easier by setting clear goals, breaking them down into actionable tasks, and tracking your progress.
- Sustained Motivation:
Utilizing a planner helps you establish objectives and stay motivated to achieve them. By visualizing your goals and mapping out the necessary steps, you create a roadmap for success. Additionally, you can employ a rewards system where you treat yourself to something you desire once you reach a milestone or accomplish a significant task.
- Better Organization and Memory:
A productivity planner serves as a central hub for all your important information. You can jot down reminders, capture fleeting thoughts, and record vital notes. This improves your organization and ensures that important details are not forgotten. With everything in one place, you can access information quickly and efficiently.
- Reduced Stress and Overwhelm:
Planning helps alleviate stress and overwhelm. Many people feel pressed because they can’t clearly see what is waiting for them or what they need to do. And if you’re a person who’s too shy to ask for the second time, a thorough productivity plan may be your best support.
A clear plan of action can mitigate the anxiety caused by uncertainty and chaos. When you know what needs to be done and have a roadmap to follow, you can approach your tasks with greater ease and confidence. When we speak about working on a team, a clear productivity plan allows people, especially newcomers, to be more independent within their new team.
How to Make a Productivity Planner?
Incorporating a productivity planner into your daily routine can unlock your full potential, achieve your goals, and lead a more fulfilling life. However, it’s important to remember that a productivity planner is a tool that works best when tailored to your specific needs and preferences. In other words, an incredible, best-in-the-world productivity plan that helped your colleague or friend to achieve their goals might turn out to be totally useless in your situation.
That’s why it’s crucial to experiment with different planning techniques at the beginning to find what resonates with you and adapt your planner to suit your unique style.
The xTiles Productivity Plan Template offers a framework for planning your next five weeks. However, you can easily customize it depending on the needed period of time and your visual preferences by adding content and/or embeds.
Here are a few important details to keep in mind if you want to create the best for your productivity plan:
Set Goals
Goal-setting helps to reflect upon your ideal life. They are the base to build your productivity planner on.
Make your goals or goal an integral part of your productivity planner, and let them guide you toward a more purposeful and productive life. They are waiting for you at the finish line of your productivity planner.
Setting and envisioning your goals is crucial for effective prioritization and achieving a sense of fulfillment. While we may desire to do everything all at once because there’s no time and we need the results yesterday, it’s essential to recognize the importance of prioritizing and dedicating time to the most significant aspects of our lives.
To set your goals successfully and efficiently for your productivity planner, consider including the following steps to guide you through the process of turning your goals into reality:
- Establish the importance:
Clearly articulate why a particular goal is essential to you. Be honest with yourself in answering this question. Understanding the significance behind your goals provides the motivation and drive needed to pursue them with enthusiasm and determination.
- Visualize the endpoint:
Think about what achieving your goal will look and feel like, what outcome it will bring you. Probably, like you’re on the top of the world. Many people believe that visualizing the victory makes our brain think that it has finished and there’s no need to do something anymore, while in reality, it motivates and helps us plan.
Paint a vivid picture in your mind of the desired outcome. This visualization helps clarify your objective and serves as a constant reminder of what you’re working toward.
- Break it down:
Define actionable and manageable steps that will lead you to accomplish your objective. Once again, be honest with yourself about your abilities and capacities at the moment. Otherwise, you might risk leading yourself to failure and despair because your plan doesn’t work, while it couldn’t work in the first place because it’s too far from the real picture.
Breaking down your goal into smaller, bite-sized tasks makes it more attainable and less overwhelming. Each step completed, even the tiniest one, brings you closer to your desired result.
- Identify resources and challenges:
Determine the resources you’ll need along the way. Compare them with the resources you have and/or can get. By acknowledging potential roadblocks in advance, you can ensure a smoother journey toward your goal.
You may consider using the quadrant view, such as the Eisenhower quadrant or SMART technique, to help you determine and prioritize your goals. They allow you to categorize your goals based on their importance and urgency, enabling you to focus on the most critical tasks first.
Embrace Flexibility
A productivity planner must be flexible to function as you require and help you adapt to changes quickly and effortlessly. On some days, you may only need a weekly overview to be productive, while on others, you may have to manage a million things going on non-stop and at the same moment. In this case, a daily layout to write them all down will be an intelligent solution to rescue you from chaos. If you’re stuck in this situation, you require a weekly and daily layout each week, while the monthly layout serves as a backlog to help you not miss something.
No two days are the sameThe last few years have taught everyone that things may shift quickly and dramatically overnight. Therefore, you require a planner to adapt to your changing needs to maximize productivity and save you from making everything from scratch once you need to edit your schedule.
You can find different categories of planners according to your needs in the xTiles Templates Gallery. It has daily, weekly, and monthly planners that have different features. You may combine a daily planner with a weekly planner to boost your performance, achieve creativity and reduce your stress level. Or you may combine them within one xTiles Productivity Planner Template.
Don’t Overwhelm Yourself
Tracking your time for a week is undeniably the easiest and most effective way to enhance your productivity. Without a clear understanding of how you spend your time, it’s challenging to accurately estimate task durations (which are often longer than anticipated).
Once you have tracked your time, the next step is time blocking, a powerful technique for planning and managing your time effectively. Time blocking involves dividing your day into specific blocks of time and allocating tasks or activities to each block. To begin, determine the optimal duration for your time blocks based on your ability to stay focused.
Once you have established the duration, decide what you will accomplish during each block. By tracking your time, you gain a realistic perspective on what can be achieved within each time block. This approach helps you maintain motivation and focus without becoming overwhelmed. You may highlight your blocks with different colors so it will be easier to recognize them.
Remember, tracking your time provides invaluable insights into your productivity and allows you to make more informed decisions about allocating your time effectively. When combined with time blocking, it becomes a powerful strategy for optimizing your productivity and achieving your goals.
Productivity Workspace

Productivity plan template
Being productive means a lot in today’s world. However, staying continuously productive is more valuable. How can one maintain productivity through a week without heading straight to burnout? A productivity plan can help!
If you start great on Monday and keep showing good results on Tuesday, but after lunch on Wednesday, you barely can understand what you’re doing, then you may need a productivity plan to maintain the same level of productivity throughout weeks, months, and years and grow at the same time.
The xTiles Productivity Plan Template is a convenient and easy framework to help you to create an effective productivity plan and put your knowledge into action. Additionally, it’s easily customizable, so you won’t experience troubles due to specification of your job or goals.
What is a productivity plan?
In simple terms, a productivity plan is a personalized strategy that enhances your efficiency and effectiveness and ensures your productivity improvement. It involves scheduling your priority tasks in an optimal manner while also allowing room for unexpected urgent tasks because we can’t plan everything no matter how hard we try and what planning tools and methods we apply.
If you know the basic principles of how to make a plan, then you can manage a productivity plan too. However, the xTiles Productivity Plan Template will ease the process and shorten the time you need to fill in the data. The Template will be especially useful if you need your productivity plan to cure yourself of burnout and inability to concentrate on your tasks.
Now, what benefits will an individual get from creating a productivity plan? Why it’s crucial to have one for being productive on a stable base, not only from time to time when you have an impulse to do something. Let’s explore the reasons:
- Organize your assignments:
A productivity plan helps users to structure and organize their tasks. And when one has a clear overview of what needs to be done, one can avoid confusion and ensure nothing slips through the cracks.
- Distinguish between significant and non-significant tasks:
A productivity plan helps differentiate between important tasks that contribute to your goals and less important ones, which enables you to prioritize your efforts and allocate your time and energy wisely.
- Improve decision-making:
When you have a productivity plan, you have a base for your decisions. You already know the answer because there is a framework to guide your decision-making process, even though it’s always burdened you. Just analyze your task in alignment with your goals, dreams, and long-term objectives, and you will easily distinguish tasks to focus on and tasks to delegate or postpone.
- Align long-term and short-term goals:
A productivity plan allows you to bridge the gap between your long-term aspirations and your daily activities. By incorporating your overarching goals into your plan, you can ensure that your daily actions are aligned with your larger objectives. This alignment brings clarity and purpose to your work.
How to create a productivity plan using the xTiles Productivity Plan Template?
Now that we discussed the benefits of productivity planning let’s dive into the process of creating a plan that will work for you. We already told you that if you have basic planning skills and have gone somewhere further than creating a shopping list, you will manage this task quite easily.
- List all your tasks and obligations:
Begin by creating an action list of all your tasks and obligations. Being the all. It’s not yet time to separate important tasks from time-wasters. It’s very important to write them down because relying solely on memory is rather an untrustworthy approach that usually leads to forgetting things or feeling overwhelmed.
- Identify obstacles and challenges:
Now that you have them all together, you can take a closer look at each task and identify potential obstacles or challenges you might encounter on your way. When we acknowledge these challenges in advance, we can develop strategies to overcome them at all or possible solutions once we are there.
- Track your time:
Making a productivity plan may take some time. The more time you can invest in learning your current habits and routine and how you spend your time, the better you will understand yourself and your natural inclinations. However, avoid the temptation to spend weeks and months on your research because that’s the opposite of productivity, and we don’t need that.
Track your time for at least a week and keep a record of essential tasks you complete each day, including both work and personal activities. You may also track time-wasting activities like social media usage.
Then, review the information you got. Examine how much time you spend on each task and how it’s distributed throughout the day.
- Develop a strategy:
Based on your productivity patterns and preferences, develop a strategy to enhance your productivity. There are various methods and techniques you can employ, such as focusing on one task at a time, utilizing time management techniques, or using project management tools.
- Experiment and revise:
Give yourself time and be patient, as finding the perfect strategy may require trial and error. Experiment until you discover a method that maximizes your efficiency.
Product Canvas
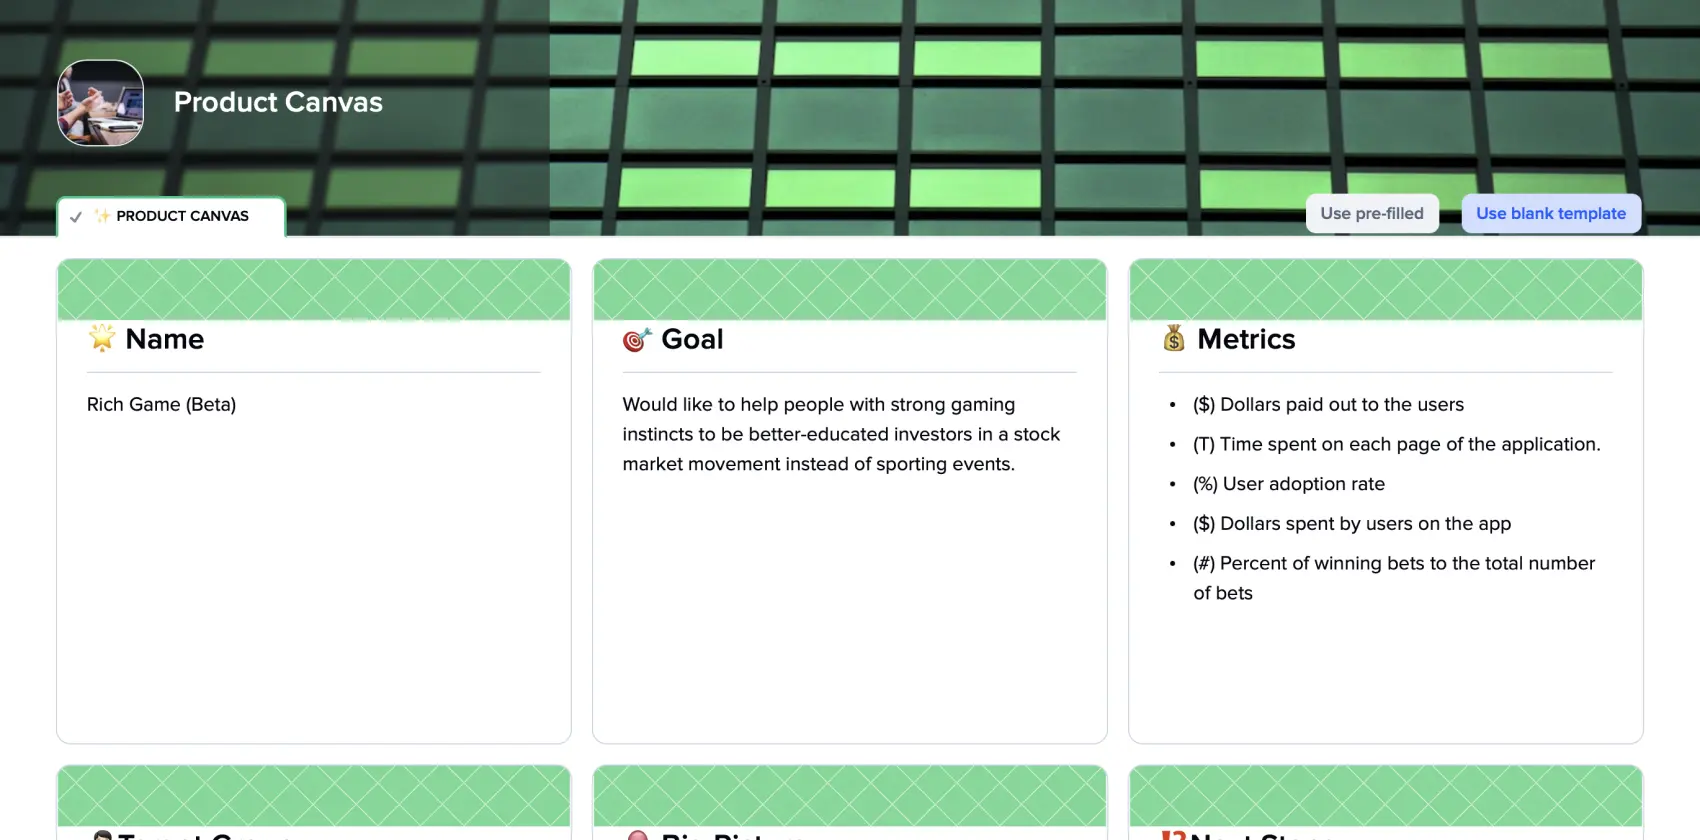
Product Canvas Template
What is the most important thing for teams working on complicated tasks? Skills? Ideas? Budget? Well, all those are definitely important and define the final result. But they are not as important as healthy communication and understanding that you all are on the same page.
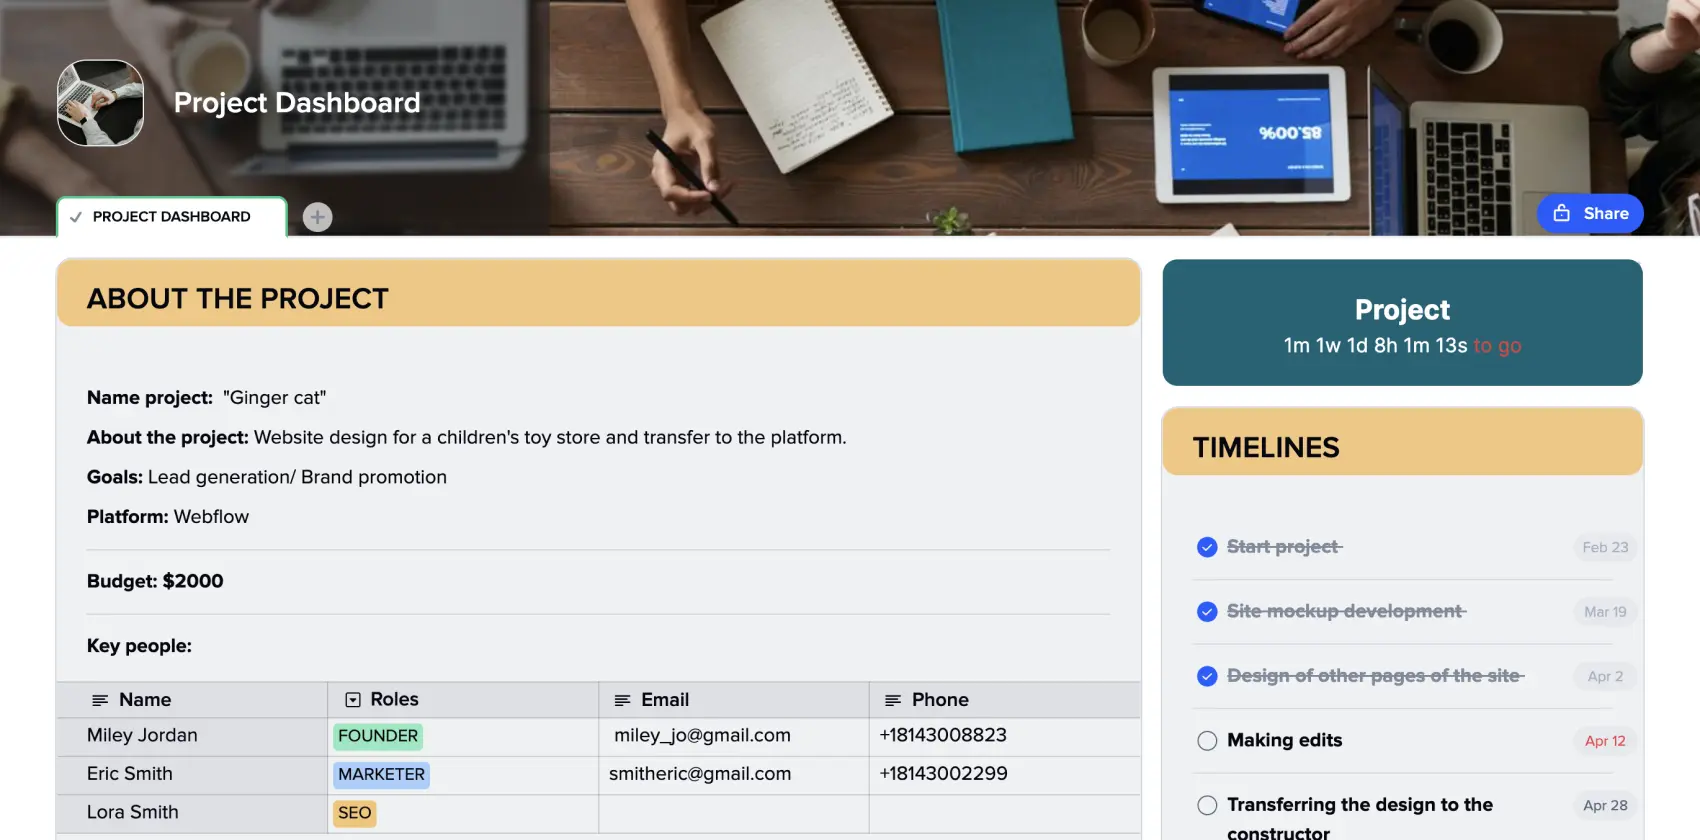
Product Canvas is a tool that helps teams to collaboratively determine and communicate the product vision and strategy they are about to pursue. Comprehensive Product Canvas also helps to communicate with your client or stakeholders.
Bringing together various aspects of a product, Product Canvas serves as a very specific knowledge base for a certain project where everyone may seek quick answers whenever they are in doubt.
A Product Canvas was developed to ease your team’s job. Structuring, gathering info, and determining the main points may take a lot of time. Imagine how far you will go using a Product Canvas template. It shortens the process significantly, leaving you responsible only for filling in all your data and reviewing it occasionally.
xTiles offers you a ready-to-use and free Product Canvas template that you can freely share with your colleagues and everyone who needs or wants to see it. We made it flexible and adaptive to the specific needs of different products and teams.
What is a Product Canvas?
A Product Canvas is well-known to be a first-step tool in defining a future project. Combining conciseness and informativeness, it defines what your project is, what it will/may become, and what strategy you need to develop and implement to succeed.
Product managers use Product Canvas to start the process that will lead to creating a product with incredible user experience and useful features. If we measure this tool from a management perspective, it unites Agile and UX by combining user stories with UX artifacts such as design sketches, scenarios, personas, etc.
A Product Canvas allows you to sell your future product to clients and investors with a single image, a single document. It also serves as a tool for communicating within big organizations or teams.
When do I need a Product Canvas?
As a rule, a Product Canvas template is usually used during product development’s early stages to align team members and facilitate discussions with stakeholders. However, we don’t always follow the rules, and the impulse to start may be so powerful that you rush into action without mapping out what needs to be done.
That’s why a Product Canvas will be useful at various stages of your product development: from the initial idea to the launch and beyond.
- You may use the Product Canvas template for idea generation.
When you have a raw idea, don’t exactly know what you want to create, and are unsure what results you want to get, give a go to the Product Canvas Template. It will help you organize your thoughts and communicate your vision to others.
- You may use the Product Canvas template for planning.
When your idea is polished and well-defined, you start planning. There will be a lot of decisions at this stage and a lot of discussions. You need a plan that will work and keep a team aligned and motivated to do their best work.
That’s why, when planning your product development, you may get many benefits from using Product Canvas. It will help to determine the key features, your target audience, your value proposition, and the metrics you will need to measure your success.
- You may use the Product Canvas template to align everyone involved around a shared vision.
When you work on a product, there are many sides interested in the successful outcome. Everyone may have a different purpose for participating in a project, but everyone involved must be united around a shared vision.
A Product Canvas template will help you ensure that everyone understands the product’s purpose, goals, and deliverables.
- You may use the Product Canvas template to prioritize tasks.
Prioritizing is one of the key secrets of successful and on-time product delivery. You can’t manage everything at once, and even if it seems that this incredibly harsh race will lead you to a perfectly finished product, you’re likely to discover new points to work on after its completion and launch. But everyone might be too devastated to go on.
A Product Canvas template will help you define what is the most important, what is less important, and what only seems to be important regarding your product goals and purpose.
- You may use the Product Canvas template to communicate.
It is said that we can’t understand someone until we’ve walked a mile in their shoes. Sharing and discussing Product Canvas with your team will work even better.
Suppose there are no words to express your ideas or concepts. You may use pictures, memes, or songs to give your team the needed vibe and information. Online templates give you more space to be inventive in communicating your ideas and visions.
As you can see, Product Canvas serves many purposes for starting a project, processing it, finishing it, and reviewing it for further improvements.
How to create a Product Canvas?
Creating a Product Canvas is much easier than fixing a mess after you’ve started doing something without a clearly defined and discussed idea. We have a quick guide for creating your own document so that you can start working on your product development asap.
Remember that the xTiles Product Canvas Template is flexible and adaptable to your product’s or your vision of the product’s specific needs and features. You’re free to add or remove sections in order to adjust the template document.
Create a Product Canvas for your project using the xTiles template and the next steps:
- What is your product name? Do you have one already? Will it have some hidden meaning? Will it refer to the problem your product solves? Naming is very important for the rest of your product’s cohesiveness.
It should be easy to remember, maybe a bit “sticky” so that people keep repeating that word or collocation in their minds without realizing it. That is one of the basic rules for naming a product.
You may have the name when you start making your Product Canvas. However, if you still haven’t come up with something nice and suitable, try brainstorming with your team.
- Now you need to define the business goals of your product. What key goals should it achieve? It may be revenue growth, market share, customer retention, etc. If you already have a product roadmap, this step won’t take more than a minute.
While defining your main goals, remember that every product is unique, so copying your competitors’ goals is sometimes not the best option, as it might lead you in the wrong direction.
- Next, you will need to set the key metrics. These metrics will help you understand whether you’ve reached your goal or not. It may be metrics such as user engagement, conversion rates, revenue, etc.
It’s crucial to make them realistic. Many teams prefer to challenge themselves by setting metric numbers that are too high or impossible to reach with the current level of their skills, budget, etc. However, such an approach rather leads to losing all motivation.
- The next step is identifying your product’s target audience. For whom do you work? Who do you want to help or satisfy?
Defining what problem your product is about to resolve is the first stage of knowing your target customers. Usually, it’s an ongoing process that needs continuous research to stay up-to-date with the changing market trends and user behaviors.
- We’re almost done. Now, you need to plan what your finished product will look like and what it will bring you in the long term. It will help to check the data you’ve just written down.
All points of your Product Canvas should be aligned with each other. Otherwise, your team might be misled with no defined plan of where to move.
- Finally, you will need to define the next steps you will take to start implementing everything you’ve just discussed and identified. That point will evolve into your action plan, keeping the connection with the Product Canvas.
Once you have created your Product Canvas, share it with everyone involved to get feedback. It may happen that after their review, you will need to refine it or change some parts of it. When the document is validated, use it to your advantage. Let it not lie somewhere forgotten.
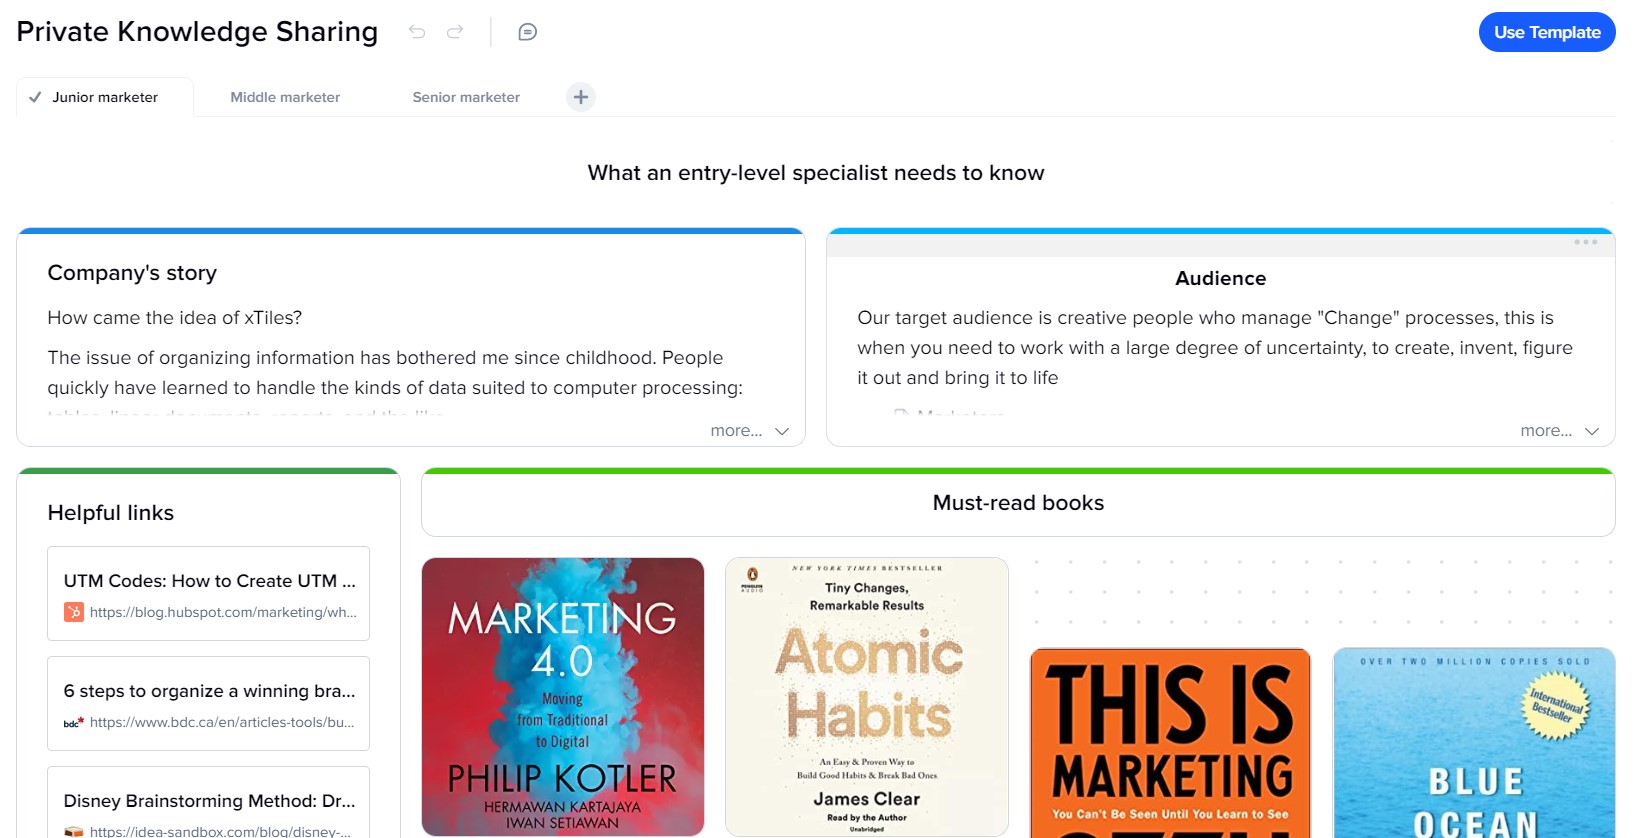
Private Knowledge Sharing
Portfolio layout
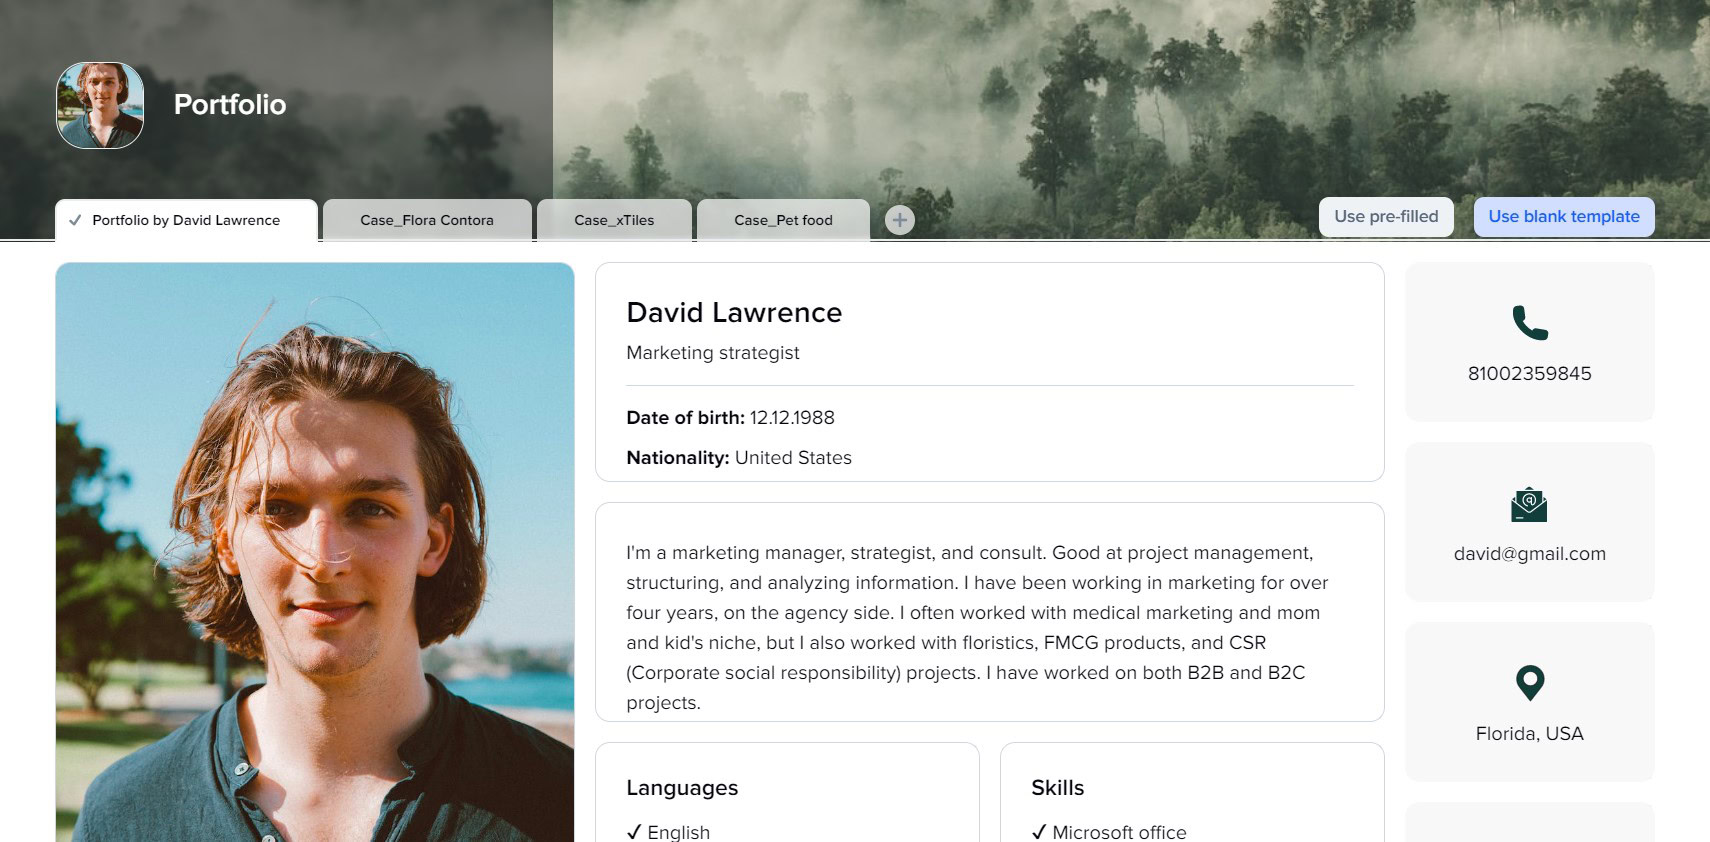
Portfolio layout template
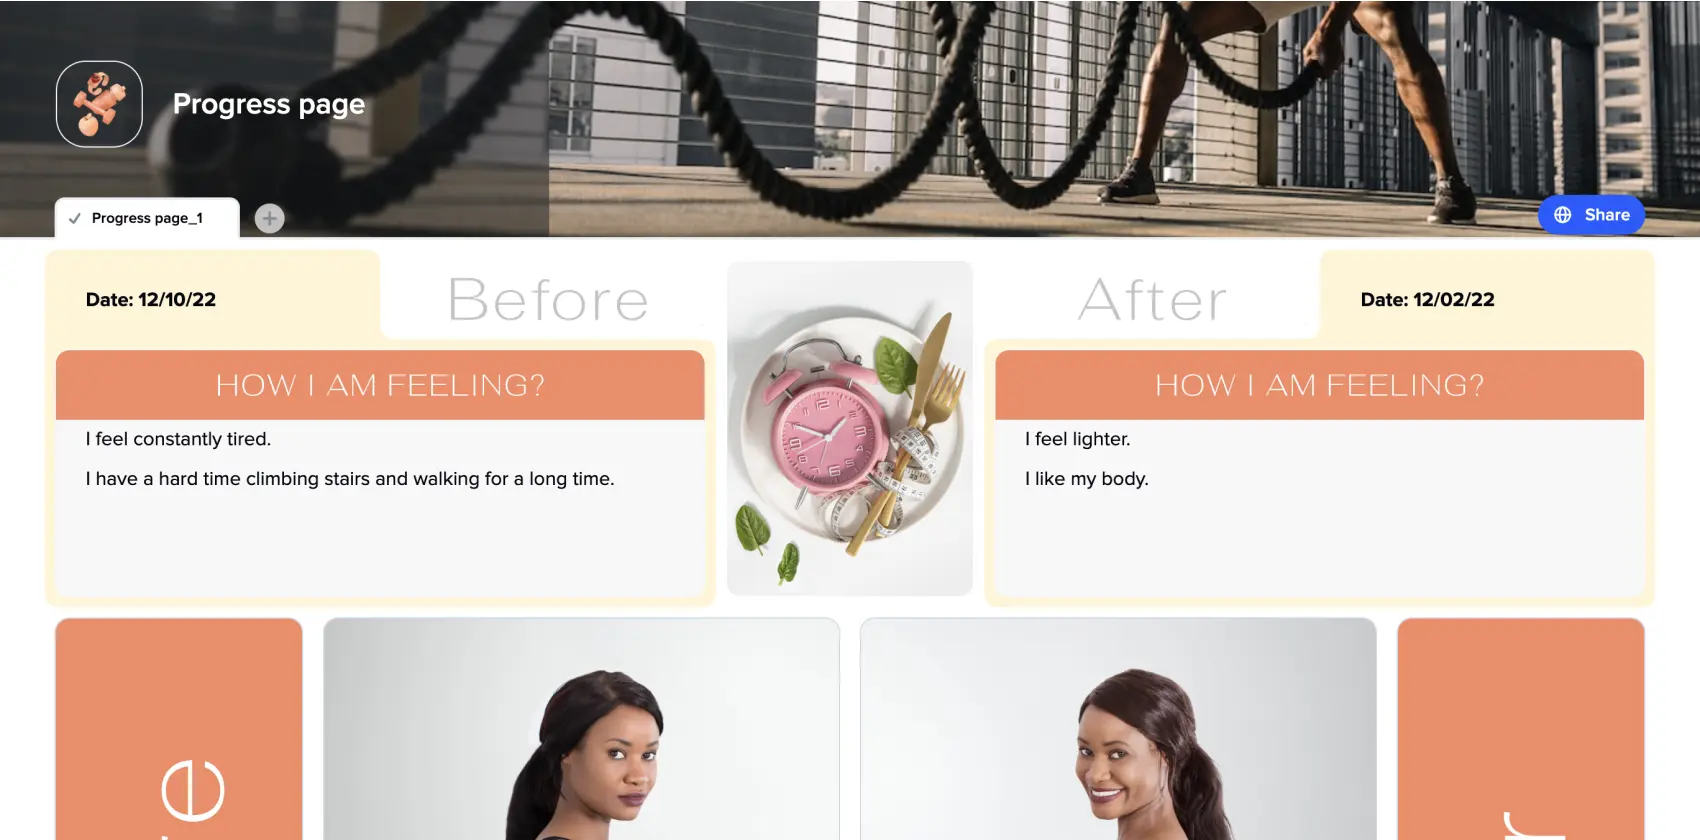
A portfolio template may help you create a more effective and visually appealing portfolio that eloquently showcases your work, accomplishments, skills, and experiences.
Finding a new job may be no easy task. However, an efficient portfolio will be the first step toward your goal, making you stand out from the crowd of other applicants. Since the first impression depends greatly on it, using a portfolio layout that fully represents you and your talent is better, quicker, and less stressful.
For many job positions, portfolios are the most important identifying tool. For example, if you’re a designer, your portfolio will be a presentation and proof of your knowledge and skills.
Your portfolio is supposed to sum up everything you’ve achieved till now and present you in the best light possible. This is a tremendous task for a small document – so you may need a portfolio template layout to help you summarize and structure everything correctly in a visually appealing way, raising interest in you and your talent.
Who may benefit from using the xTiles portfolio layout template?
Generally speaking, any person seeking a new job would benefit from using a free portfolio layout. Here are some cases where ready-to-go templates are especially handy:
- Those who haven’t upgraded their portfolios in years but don’t want to waste a great offer right now by responding slowly.
- Those who need to create their first portfolio but don’t know where to start.
- Those who have little or no skills in graphic editing tools but want something stylish and well-structured.
- Those who value their time highly and prefer to use it for something other than creating portfolio structure and style.
Sometimes people are convinced that their case is so specific that there can’t be a pre-made portfolio layout template for them, so they won’t even bother to google. It’s not necessarily true, but some kinds are harder to find.
You may not get what you need when looking for something specific, like an architecture portfolio layout or an interior design portfolio page layout. That’s why basic flexible portfolio templates are the best.
The portfolio layout template we offer is suitable for a wide variety of jobs and positions, including graphic design.
xTiles portfolio layout template advantages
Using the xTiles portfolio template may bring you several benefits, including:
- Consistency: Maintaining a consistent layout and format throughout the document will be easier. A portfolio with unified fonts, sizes, and alignment is easier to read and represents its creator as a person who pays attention to details.
- Time-saving: You save time on actual projects using a ready-to-go pre-designed template. Many designers fall into the trap of spending days designing a unique portfolio that is supposed to work like one of their projects. However, your previous experience and projects can tell potential clients or employers that you’re a professional.
- If you’re a freelance designer, your portfolio changes and grows constantly. A ready-to-use template will help you maintain it up-to-date at a low price.
- Accessibility: Creating it once, you can save it and share it with anyone on the internet whenever you need and want.
- Flexibility: You can adjust our template using various customization options to match your personal needs or company branding.
How to create a graphic designer portfolio using the xTiles Portfolio layout template
When creating an effective portfolio, you need to remember many details and use all the available options to reach your goal. Here are some tips and tricks to hasten and ease the process, especially if it’s your first time.
1) Decide for whom you’re creating your portfolio.
Surely, you do it for yourself in the first place. However, you need to keep in mind that you and the people who will check it have slightly different goals. So, are you looking for an employer or clients? What type of work do you want to get?
Understanding who you are creating it for will help you tailor your portfolio to their needs and show you and your skills from the needed angle.
You may even make a few different portfolios depending on the kind of job or project you’re hoping to get and use them according to available positions and offers.
For example, if you work in the fashion industry, you may have a fashion design portfolio layout and a costume design portfolio layout based on your previous experiences. That will help show your potential client or employer that you match their needs perfectly.
2) Provide them with some information about yourself.
A basic portfolio page layout should start with your name, phone number, email, position you are applying for, skills, etc. Don’t overwhelm a recruiter or your potential client with your previous work.
Sometimes, people in charge of hiring new personnel may lack design knowledge. That’s why you need to attract them with structured and easy-to-grasp information about yourself. In other words, start with what everyone understands to make them go to see what you can.
We already prepared these sections. All you need to do is to add your data and your photo.
3) Choose your best work.
Sometimes people choose to show everything they have in chronological order, which is bad, especially if you have a couple of years of experience. People might not go over everything simply because they don’t have enough time.
Start with something powerful. Let the work you believe to be your magnum opus so far be the first thing your potential client sees. However, leave something great for the end too. You need to show your expertise, creativity, and versatility as a designer.
It’s important to remember that people who are looking for an employee don’t need to see your growth as an artist. That’s rather a topic for your personal blog or discussions with your fellow designers. But if it’s very important for you, you may talk about it in the interview. However, you need to get one first.
4) Don’t be afraid to add self-initiated work.
Many people consider their self-initiated work only a hobby that may not interest their potential clients or employer. However, how you implement your own creative impulses is important for better understanding you as an artist. You may create your own vision of some popular art concept of advertisement just to represent your individual voice.
Many employers don’t add this requirement to a job advertisement, yet it doesn’t mean they don’t want to see your self-initiated work. Just remember tip #3 and choose your best work.
5) Don’t put all of your cards on the table in your portfolio.
Your portfolio should convince people to have a meeting with you to discuss your previous projects in detail. Make them want more, and leave for yourself a couple of aces up in your sleeve.
You need to find a perfect combo between what you want to show people and what you would like to save to discuss during the interview.
6) Don’t forget about context.
When presenting your previous works and achievements, don’t forget about adding some context so that people who see your portfolio can understand what was going on in the pieces you chose to showcase. That will help people to understand your design process and how you work.
Information about your previous works is also important for checking whether it was a real project with some recognition and success or a self-initiated work.
Remember that images should talk louder than the text is important. Use images of great quality to present your designs in the best possible light allowing people to see even the tiniest details. Using the xTiles portfolio layout template, you can upload files up to 500 Mb, even in a free version.
When adding descriptions to your units in the template, you may create small blocks near each piece and group them to show their connection.
7) Make it easy to navigate.
If there’s a lot you want to share, don’t turn it into a pile of pieces that are more of a riddle than a representation of what a great worker you are. Organize your work into sections or categories. Add headings if you need to put more clearance. Using the xTiles portfolio layout template, you can create different documents for each of your projects or for separating your previous projects from self-initiated work.
8) Keep it up to date.
Add your new projects to your portfolio regularly, so you won’t need to do it hastily whenever you see a great job ad or get an offer. Also, it may be important to remove something that doesn’t represent you and your style anymore. Maybe you outgrow your first attempts in graphic design, so say “goodbye” to them and replace them with newer work.
Also, ensure your contact information is up to date, so your potential clients or employers can easily contact you.
9) Don’t be afraid to talk about your work.
If the pieces you included in your portfolio are those you’re exceptionally proud of, then talking about them won’t be much of a bother to you.
However, sometimes people believe that their portfolio speaks for themselves, so they choose to remain mostly silent during an interview. It may be a humble decision to let others decide whether their work is worth it or not. However, your portfolio might need help to do the job. If you’re truly passionate about what you do, don’t be afraid to show it.