Design resume
Graphic Designer resumes help you make a great first impression on your potential employer or client.
The correctly crafted resume will ensure you relevant design projects where you can grow, develop new skills, and find innovative solutions. It helps you find clients who are aligned with your vision and approach to work, minimizing the time you spend making amendments afterward.
A graphic design resume template is a quick way to highlight the outcomes you have achieved and demonstrate to potential employers why you would be a valuable addition to their team.
There are many tricks and tips on how to create an effective and attractive resume for a graphic designer or any other kind of designer. Matching them with a ready-to-go xTiles Design Resume Template will help exhibit your design abilities from the best possible angle with little or no effort.
Additionally, we offer you a resume design example to show you the possible result and guide you through the creation process.
What is a resume design?
A resume (you may also know it as a CV or Curriculum Vitae if you’re outside of the US) is a formal document where an individual presents a comprehensive summary of their professional qualifications. It encapsulates relevant work experience, skills, education, and noteworthy achievements, providing employers with a snapshot of a candidate’s capabilities and helping to decide whether the person is qualified enough for their job offering.
Today, applying for a job without a resume is impossible. You will get lost in a stream of other candidates with resumes and portfolios. It’s a vital tool to showcase your qualifications and enhance your chances of being considered for the position. When crafted according to your professional capacities and the company’s offering, it effectively demonstrates your abilities, proving to employers that you possess the necessary qualifications and are a fitting candidate for the role.
Graphic resume design, web design resume, game design resume, UX design resume, etc., all serve the same purpose. They help individuals effectively communicate their skill set, expertise, and accomplishments, proving that they are qualified for the job.
Quick tip for those who decided to move to Europe: in Europe, the term “CV” is commonly used to refer to what Americans typically call a “resume.” Therefore, when applying for jobs in Europe, you may easily utilize your existing US resume by simply renaming the file as “[Name] CV.” This straightforward adjustment ensures that your application aligns with the terminology and expectations prevalent in European hiring practices.
When do I need a resume design?
Consider your resume as a strategic marketing tool that effectively promotes your skills and qualifications, aiming to persuade employers that you are the ideal candidate. While your portfolio beautifully showcases your design prowess, your resume serves the purpose of articulating the tangible outcomes of your work. It showcases your training, experience, and ability to deliver impactful results.
Remember, your graphic designer resume should not be an exhaustive compilation of every task you’ve undertaken. Instead, it should provide a concise snapshot of your most noteworthy accomplishments. Concentrate on highlighting how your graphic design expertise can contribute to the company’s objectives and aspirations. By focusing on the value you can bring, your resume becomes a persuasive document that captures the attention of potential employers.
Art directors and marketing managers highly value well-designed and visually appealing designer resumes. People who are looking for an interior designer to make their premises look outstanding value representative interior design resume as well. No matter in which design field you operate, you need to have a resume to communicate your skills and visions quickly. Otherwise, you risk getting clients with totally different ideas, which will lead to misunderstandings and stress for both of you.
A resume for a designer increases the chances of being understood and appreciated for what you do. That’s why it is crucial to customize your resume according to the specific job you are seeking and your graphic design skills, experiences, and previous accomplishments.
If the content of your resume is mostly for a hiring manager or a person who conducts the first screening, its appearance and visual components are for other designers or people who know something about good design. A thoughtfully crafted resume has a higher chance of capturing their attention and making a strong impression on your potential client or employer.
Design resume templates
By incorporating design principles and demonstrating your typography skills, you can create a visually appealing and engaging resume that captures the attention of art directors and marketing managers. However, when you need to make a couple of them, it becomes challenging. That’s where ready-to-use templates come in handy. They are already designed according to the main principles of design, so you don’t have to worry about that.
For example, the xTiles Design Resume Template is made by professional designers according to the most important design principles and rules.
- White Space
White space is an inevitable element of any modern resume design. It effectively provides visual clarity and gives the reader’s eyes a rest. A well-balanced use of white space creates a clean and organized appearance, making it easier for employers to navigate your resume.
- Legible Fonts
They ensure easy readability. The xTiles Design Resume Template offers clear and professional typefaces, enhancing your resume’s overall readability. It also avoids overly decorative or elaborate fonts that may hinder comprehension.
- Typography Expertise
As a graphic designer, your knowledge of typography should shine through in your resume. However, how can you demonstrate that if you’re limited in time? The Template helps you to showcase your understanding of different typefaces, font pairings, and typographic hierarchies. It also helps to demonstrate your ability to create visually engaging and harmonious layouts through effective typography.
- Fancy Fonts
It allows using fancy fonts in headings, titles, or specific sections to make them stand out and create visual interest. It helps to strike a balance between creativity and readability to maintain a professional appearance.
How to create a graphic design resume using the xTiles template?
While the content in your design resume is significant, hiring managers also evaluate how you present that content. A clean and visually appealing resume with a minimalistic approach is always a perfect decision that won’t steal attention from you and the artwork you included.
The xTiles Design Resume Template is built according to that principle. It offers you a simple yet sophisticated structure to present you as a professional in the best possible way. You don’t have to worry about fonts, colors, and white space for easy readability because everything has already been handled.
Planning and preparation
- Conduct thorough research
Take the time to delve into the company’s realm by familiarizing yourself with its work, mission, values, and challenges. Explore their website, social media platforms, and search for relevant news or articles about the organization.
Your resume should match their needs. That’s why ready-to-use design resume templates are so useful. When applying for a couple of positions, you can quickly tailor a needed number of documents for every company.
- Analyze the job posting
Pay close attention to the specific requirements outlined in the job posting. Identify key skills and qualifications mentioned, and incorporate them into your resume. Some companies use resume-screening software. A resume without relevant keywords, even if you’re the best candidate, might not make it through the initial screening stage.
- Curate your most applicable work
Although you may possess an endless portfolio and a vast array of skills, it is crucial to select the most relevant details to answer the company’s exact offer. For instance, if the company seeks someone with branding experience, emphasize your accomplishments in creating impactful and cohesive brand assets.
However, it’s important to keep the document manageable. Don’t add all your previous artwork to the resume. Instead, you may include a hyperlink to your portfolio, enabling employers to explore a more extensive collection of your work.
Crafting your design resume
- Personalize your resume
Create a unique resume tailored to each Graphic Designer position you apply for. While a generic resume may seem convenient, customizing your resume helps you stand out from the competition and represent the needed skills and experience each time.
- Keep it concise
Focus on providing relevant and impactful information rather than attempting to include every detail. Hiring managers deal with dozens and dozens of resumes every day, so you have only a few seconds to attract them with your document. Use that time to the maximum and provide all the important information about yourself in a brief way.
Usually, a one-page resume is enough, even for individuals with years of experience and projects under their belt.
- Maintain organization
Prioritize readability. Once again, the time a hiring manager can spend reading your resume is limited. They will need to find out that you’re the best match for their position very quickly and not on the third page of your resume.
You can reach that effect by using clear headings, well-defined sections, and bullet points to structure your content. A well-organized resume will make it easier to navigate and grasp your qualifications in a moment.
Additionally, you never know who will check your design resume during the initial screening process, so you need to ensure that its content is easy to understand for anyone.
- Utilize dynamic action verbs
You’re a designer, and creating great visuals is your best skill. However, to get the desired position, you sometimes need to go beyond and over.
Emphasize your achievements through powerful action verbs. If you have never done something like that before, you may find many examples of action words for resumes on the internet. For example, such verbs as spearheaded, informed, evaluated, advised, conceptualized, trained, focused, individualized, enhanced, shaped, etc., may add strength and impact to your accomplishments.
- Demonstrate your skills
Instead of merely stating your abilities, showcase them through tangible evidence. That will speak louder than any descriptions of your previous work.
Share your past design projects and include links to your work.
- Craft accomplishment statements
When listing your professional experiences, create accomplishment statements to provide maximum data in a short, consistent manner. The best formula for your statements is verb + task + result. This structure highlights your contributions and outcomes in a concise and impactful manner.
Reviewing and editing your design resume
- Take a fresh perspective
Once you’ve completed the initial draft, give yourself some time away from it, whether a few hours or even a day. The approach you usually take with your work will be good. When you return to review it, you’ll have a clearer mindset and can identify any necessary changes or edits.
Check whether all elements and details of your resume are organized according to one system. Check whether there are no strange compilations of fonts or sizes, which might be very eloquent for a design resume.
- Seek a second opinion
It’s beneficial to have a trusted friend, colleague, or mentor review your resume. They can provide valuable feedback on readability and identify any spelling or grammar errors that you might have missed.
If you don’t yet have a fellow designer to show them your resume, just show them the person you trust no matter what industry they work in. People’s eyes usually can perceive small details though designers are better trained and can explain what is wrong and what needs to be improved.
- Thoroughly proofread
Before submitting your resume, run a spelling and grammar check. Additionally, you may read your resume aloud to catch any awkward phrasing or other mistakes. That’s a great method many writers use to detect mistakes and strange wording constructions.
Diligent proofreading is crucial, as resumes with excessive errors may be dismissed immediately. If you’re not sure about your proofreading skills, you may use an application that does it for you. However, be ready that you still will need to read the text after the application finishes correcting or suggesting corrections because none of them is 100% precise, at least yet.
What to include in a designer resume?
You may want to share as many facts about you as possible to persuade the person responsible for hiring new personnel to hire you. However, usually, such an approach brings the opposite results, and you get nothing. Your resume has to be about balance and harmony.
Here are the basic chapters for any design resume which are enough to make people believe you are a great match for their position:
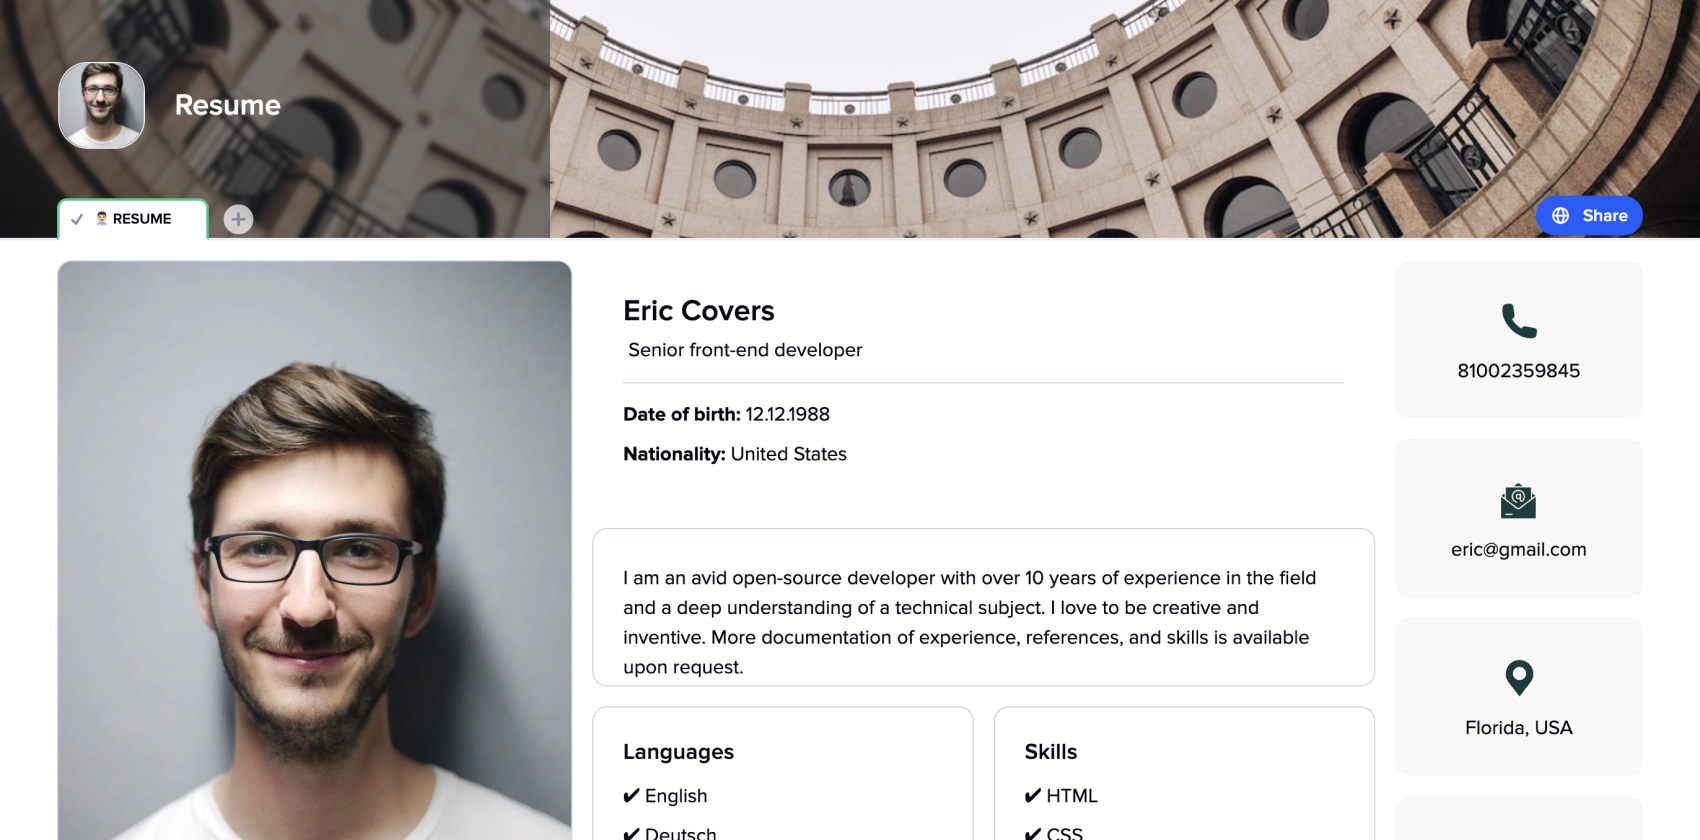
- Profile
Grab the hiring manager’s attention and everyone who will read your resume with a captivating profile or summary. Usually, two to four sentences to highlight why you are the best candidate for the position is more than enough. The point is, hiring managers don’t have time to read more during the pre-screening stage.
Don’t forget to include your key skills, notable achievements, and what you bring to the company. Remember to be humble but confident throughout the whole document.
- Experience
Present your relevant professional experience, yet make sure you list them in reverse chronological order. The oldest work is down on the list, and the newest one in the top.
Include your job title, employer, start and end dates, and location. Craft two to three bullet points for each experience, focusing on your accomplishments rather than just responsibilities. That is the best place to use the active verbs we discussed earlier.
- Education
Provide the name of the institution, degree or certification earned, and start and end dates of your training.
Those who have only recently graduated from a graphic design program and have limited work experience can highlight their educational achievements and relevant projects.
Be ready that the graphic design student’s resume will contain only fewer points in each category. If you’re a novice designer, you need to attract potential employers by your willingness to work hard and develop new skills or by a specific vision and approach no one else has.
- Skills and Tools
List your primary technical skills, including the tools and software you are proficient in. Ensure that the skills you highlight align with those mentioned in the job posting.
Here are some basic designer skills you may include or consider including depending on your desired position: Adobe Creative Suite, User Experience (UX) Design, Knowledge of HTML, CSS, Branding and Identity, UI Design, Composition, Color Theory, etc.
Also, remember that your soft skills are important too. Don’t forget that you’re a team player who is great at communicating with others.
- Awards/Activities/Other
Include additional sections as necessary to showcase your awards, activities, or involvement in professional organizations. That’s how you can demonstrate your passion for design.
- Portfolio
Remember to include a link to your digital portfolio and incorporate specific project links throughout your resume for easy access to your work samples. Your portfolio and your resume should work together. None of it should take all the attention.
If it’s your first time crafting a portfolio, you may use the xTiles Designer Portfolio Template and the guide we presented.
A design resume is the simplest way to make a great impression on potential clients or employers. And wasting such an opportunity is a crime in the professional world, especially when there are ready-to-use resume templates.
Research Proposal
Creating a compelling research proposal is already on your horizon if you are approaching the final stages of your degree or considering applying for a Ph.D. program.
If you have landed on this page, you are likely seeking detailed information on the nature and importance of a research proposal. And probably some tips and shortcuts to an effective proposal document.
Below, we will embark on a journey into the intricate world of research proposals and research proposal templates, unveiling their purpose, components, and profound relevance within the realm of academic endeavors.
We also offer you a research proposal example to help you clarify exactly what you must do and understand the essential elements required to fashion a captivating and meticulously structured research proposal.
What is a research proposal?
A research proposal is a formal and organized document to outline your research objectives, justify its importance, and describe the methodology you plan to apply to conduct the investigation.
The primary purpose of a research proposal is to persuade your research supervisor, committee, or university that your research topic is appropriate for the degree program requirements and can be feasibly carried out within the given time and resource constraints.
In other words, your research proposal must effectively present and promote your research idea to those approving it. Failing to convince them of its suitability and feasibility will require you to revise and resubmit, resulting in valuable time loss and potentially delaying the commencement of your research or reducing the allocated time available, which is unfavorable.
Why do I need a research proposal?
As a student, you may need to write a research proposal as part of your graduate school application or before commencing your thesis or dissertation.
Apart from assisting you in building your research, a proposal plays a crucial role in showcasing the significance of your project to potential funders, educational institutions, or supervisors. It demonstrates why your undertaking is worth pursuing and deserving of support.
A research proposal serves several objectives that contribute to its overall cohesiveness. These aims can be categorized into four key areas: relevance, context, approach, and achievability.
Relevance is a crucial aspect of a research proposal. It involves demonstrating to your reader why your project is interesting, original, and important. By clearly articulating your research’s significance and potential impact, you can convince others of its value and garner their support.
Context is another essential element of your proposal. It entails showcasing your familiarity and comfort with your field of study. That involves demonstrating a comprehensive understanding of the current state of research on your chosen topic. Provide your readers with the context of your research to establish your credibility as a researcher and highlight your ability to build upon existing knowledge.
The approach section of your research proposal focuses on presenting a well-structured case for your chosen methodology. Here, you need to explain the reasoning behind your research methods and provide evidence of careful consideration regarding the data, tools, and procedures necessary to carry out your investigation. By demonstrating a thoughtful approach, you increase confidence in the validity and reliability of your research.
Lastly, achievability refers to confirming that your research project is feasible within the designated timeline of your program or funding deadline. It is important to assess and communicate the practicality of your proposed research, ensuring that it can be realistically executed given the available resources. By addressing this aspect, you establish the credibility and attainability of your project.
By emphasizing the importance of the project, demonstrating your knowledge of the field, justifying your methodology, and confirming its feasibility, you build a solid foundation for gaining support and approval.
Research proposal template
While a research proposal is all about structure and precision, a person who has never written it before might easily go awry once trying. A research proposal template is a shortcut. In other words, it’s a half-made document with a defined structure that only waits for your data to be filled in.
For example, the xTiles Research Proposal Template also provides quick tips for each section of your document to help even those who found out about such a proposal 5 minutes ago to make theirs quickly and efficiently.
Before you start crafting your own document, you may check our proposal research sample to get an understanding of how it should look and what should be there.
Additionally, a template will be a great solution for those who are dangerously close to a deadline. Being a premade document, it saves a great deal of time, helping to manage what is up to you as fast as possible.
Research proposal templates exist in different formats. For example, you may stumble upon a research proposal presentation ppt template. However, it’s better to choose documents that allow a maximum of structured information on one page to ease the lives of people who will read it.
How to write an effective research proposal using the xTiles Research Proposal Template?
A comprehensive research proposal, whether for a dissertation or thesis, should cover three crucial elements: the “what,” the “why,” and the “how” to help you meet your goal – persuade people that it’s worth trying and has potential.
Let’s dive deeper into each of these aspects by going step-by-step through all the elements:
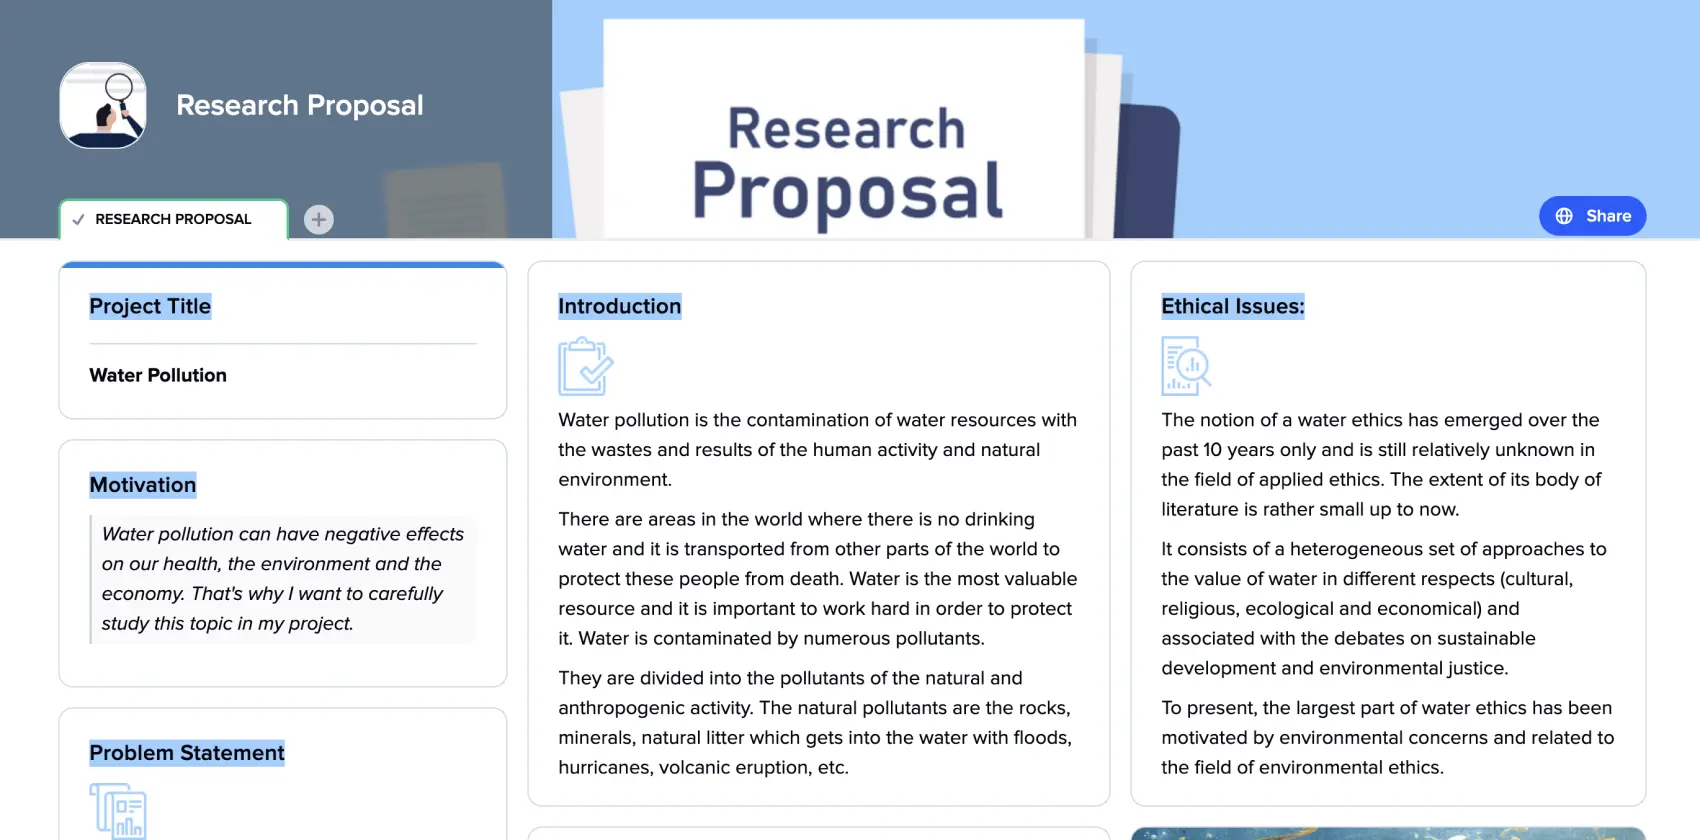
Project title
Similar to your dissertation or thesis, a research proposal typically begins with a title page providing important information about your project. This creates a cohesive and professional document that establishes the foundation for your research project.
It is essential not to commence writing your proposal until you have a clear topic in mind; otherwise, your proposal may lack coherence and suffer as a consequence.
A proposed title is where you state the title of your research project. It should accurately reflect the essence and focus of your study. Every word is important because you’re limited. So, think carefully about it or ask for advice.
Remember that your topic must also be useful and generate value, and you must effectively convey this value in your proposal.
Finally, don’t forget to include your full name as the researcher or author of the proposal. This helps identify you as the primary investigator of the proposed research.
Motivation
To break the ice, continue by explaining why you’re interested in this particular project topic. Even though your research proposal showcases it, a short explanation of your motivation will leave no room for ambiguity and misunderstanding.
Defining a research topic is not sufficient; you must justify originality. What sets it apart? What gap fills in the existing body of literature? Merely rehashing existing research is unlikely to gain approval; your topic needs to offer something fresh.
Be honest with yourself and your “audience,” explaining what is so attractive about your topic.
Introduction
The introduction section of a research proposal serves as the initial pitch for your project, setting the foundation for the rest of the proposal. It is crucial to concisely communicate what you intend to accomplish and why it is significant.
Within your introduction, it is essential to:
- Introduce your topic:
Clearly present the subject matter of your research, providing a concise overview of the area of study you will be exploring.
- Provide necessary background and context:
Offer relevant background information to ensure readers understand your research’s broader context. This may include key theories, concepts, or previous studies related to your topic.
- Outline your problem statement and research questions:
Clearly state the problem or gap in knowledge that your research aims to address. Present specific research questions that will guide your investigation and help fill the identified gap.
To effectively craft your introduction, consider incorporating the following information:
- Identify potential stakeholders:
Highlight the individuals or groups who may have an interest in your research topic, such as scientists, other scholars, or industry professionals.
- Assess existing knowledge:
Discuss the current state of knowledge in the field and indicate what is already known about your research topic and what still needs to be clarified.
- Justify the research:
Convey why your proposed research is worth pursuing by outlining its potential benefits, such as advancing scientific understanding, informing policy decisions, or addressing practical challenges.
By effectively structuring and addressing these components in your introduction, you will provide a compelling rationale for your research proposal, capturing the interest and support of your audience.
Ethical issues
Describing the ethical issues associated with the investigation is crucial to demonstrate a strong awareness and dedication to conducting responsible and ethically sound research.
Depending on your topic and field of investigation, the ethical issues of your proposal will differ. If your topic is theoretical, you need to explain why investigating it is important from an ethical point of view.
However, if your research includes participants, everything becomes much more complicated. Here are some guidelines for effectively addressing ethical considerations within your research proposal if there are people involved:
- Research ethics review:
Clarify that your research proposal will undergo an ethics review process to ensure compliance with ethical guidelines and regulations.
- Informed consent:
Discuss how you will obtain informed consent from participants or subjects involved in your study.
- Confidentiality and privacy:
Explain the measures you will implement to protect the confidentiality and privacy of participants.
- Data collection and handling:
Detail the methods and procedures for data collection while ensuring participants’ privacy and confidentiality.
- Potential risks and benefits:
Discuss the potential risks participants may face and acknowledge your strategies for mitigating and managing these risks.
Problem statement
Originality alone is not the sole criterion for your research proposal. Once you have established its uniqueness, you must also explain why your proposed topic holds significance. In other words, what value will it contribute to the world if your research objectives are achieved?
A problem statement in a research proposal must concisely describe the specific issue or gap in knowledge that your study aims to address. It should clearly define the problem, provide relevant background context, justify its importance, and be framed in a way that allows for measurable objectives or research questions.
Writing a clear and concise problem statement is crucial for establishing the foundation of your research proposal and highlighting the significance of your study.
Objectives
Writing clear and well-defined objectives in a research proposal is crucial for guiding your study and demonstrating the intended outcomes. Well-crafted objectives act as a roadmap, guiding your research and allowing for the evaluation of project success. They focus your study and provide a basis for assessing research outcomes.
Here are some effective guidelines:
- Be specific:
Clearly state what you aim to achieve, focusing on specific aspects of your study.
- Use measurable criteria:
Define your objectives using quantifiable terms or indicators to assess success and outcomes.
- Be realistic:
Set attainable objectives within your research project’s resources, time, and limitations of your research project.
- Align with the problem statement:
Ensure your objectives directly address the identified research gap or problem statement.
- Consider relevance:
Demonstrate how achieving your objectives contributes to knowledge advancement, practical solutions, or theoretical contributions in your field.
- Provide clarity:
Write objectives concisely using action verbs, avoiding ambiguity, and using precise language.
Approach
Having an excellent and valuable research topic is important, but unfortunately, it doesn’t solve all the problems independently. Without addressing the practical aspects, it will be challenging to gain approval. On the contrary, you might turn your subject useless without a concise and precise description and explanation of your chosen methodology.
In other words, writing your research proposal, you need to answer next questions:
- How will you conduct your research? (i.e., your methodology)
- Is your chosen research methodology suitable for achieving your research objectives?
- Can you manage your approach within the given constraints (e.g., time, budget)?
It’s important to remember that when writing a research proposal, you should provide a high-level overview of your research methodology because, at this stage, you simply don’t have time to detail every aspect of your approach.
Try to address these significant questions in your research proposal:
- What approach will you take? (for example, qualitative, quantitative, or mixed-method approach). Remember that it must be suitable for your expertise and research.
- What sampling strategy will you adopt?
- How will you collect data? (e.g., interviews, surveys, etc.)
- What data analysis methods will you employ?
- What potential limitations may arise from your methodology?
Ultimately, it is crucial to consider the practical aspects of your research and have a basic methodological plan before writing your proposal.
Thematic Categories
When writing thematic categories in a research proposal, it is important to clearly identify and define the key themes or categories that will guide your data analysis and organization.
Here are the guidelines to help you effectively incorporate thematic categories into your research proposal, ensuring a clear and structured approach to analyzing and interpreting data within the identified themes:
- Determine your research focus by identifying the main areas or topics of interest.
- Review relevant literature to identify common themes or concepts that emerge.
- Create an initial list of thematic categories that capture the key aspects of your research topic.
- Justify the selected categories, explaining their relevance and alignment with your objectives.
Timetable
Setting a realistic timetable in a research proposal is crucial for several reasons. Firstly, it ensures the feasibility of your project within the given timeframe, considering available resources and potential challenges.
Secondly, it helps plan and organize research activities, allowing for a systematic approach. A well-defined timetable enhances accountability, enabling progress tracking and early issue identification. Additionally, it aids in efficient resource allocation and instills confidence in reviewers and stakeholders, increasing the proposal’s credibility.
References
A comprehensive literature review serves as the foundation for your project, showcasing that it is rooted in existing knowledge or theory. It also establishes that your work goes beyond replication by utilizing previous research as a springboard for your own contributions.
Within this section, you should mention resources and other scientists’ works your research will be based on to clarify your approach.
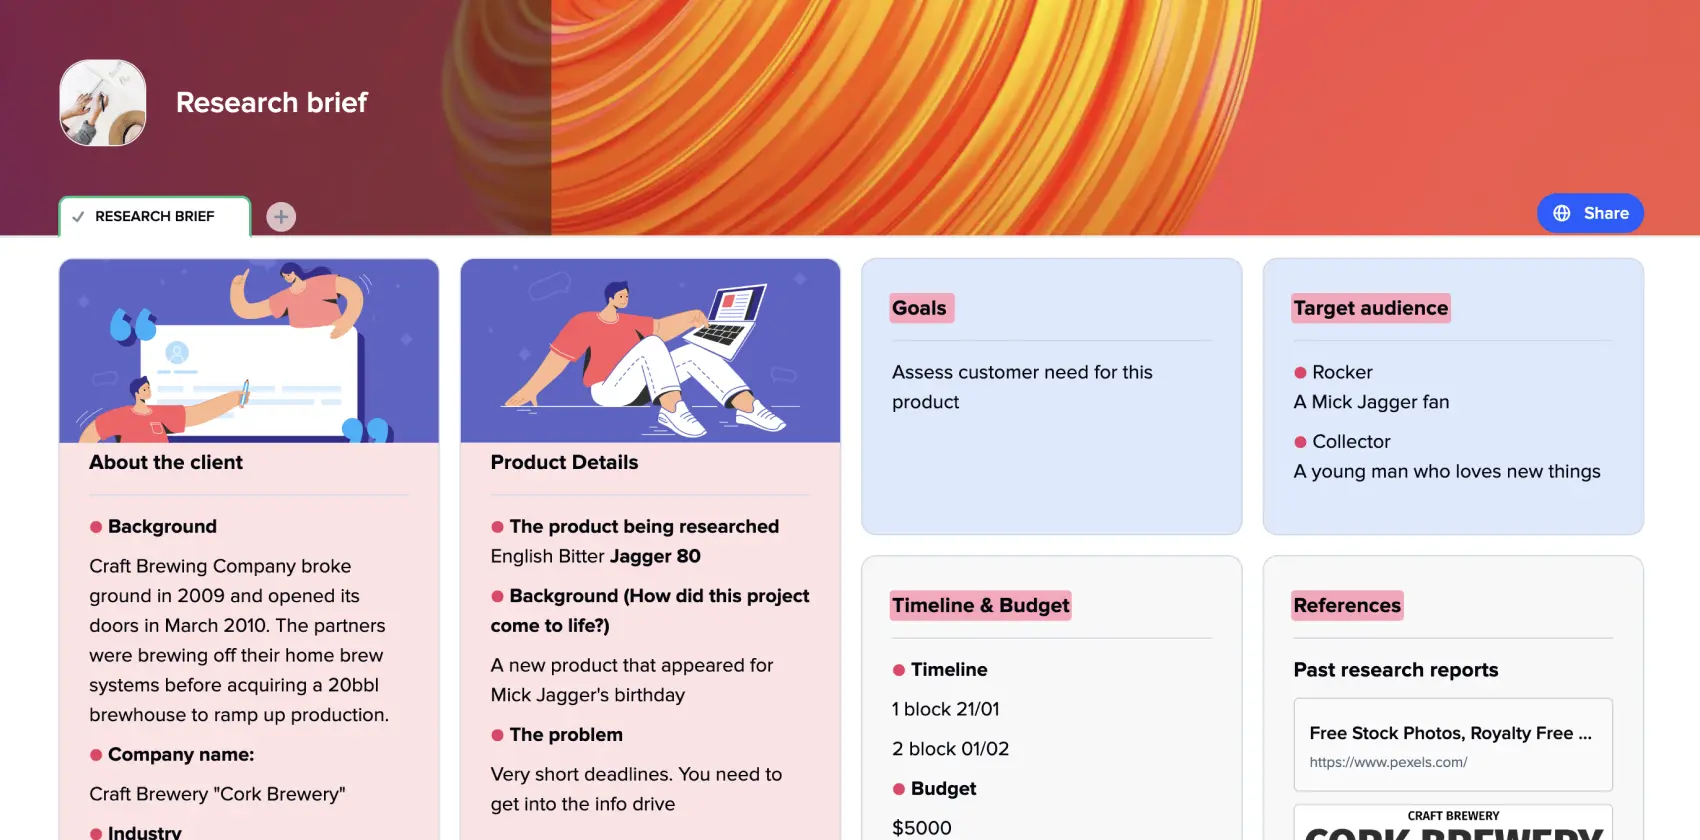
Research brief
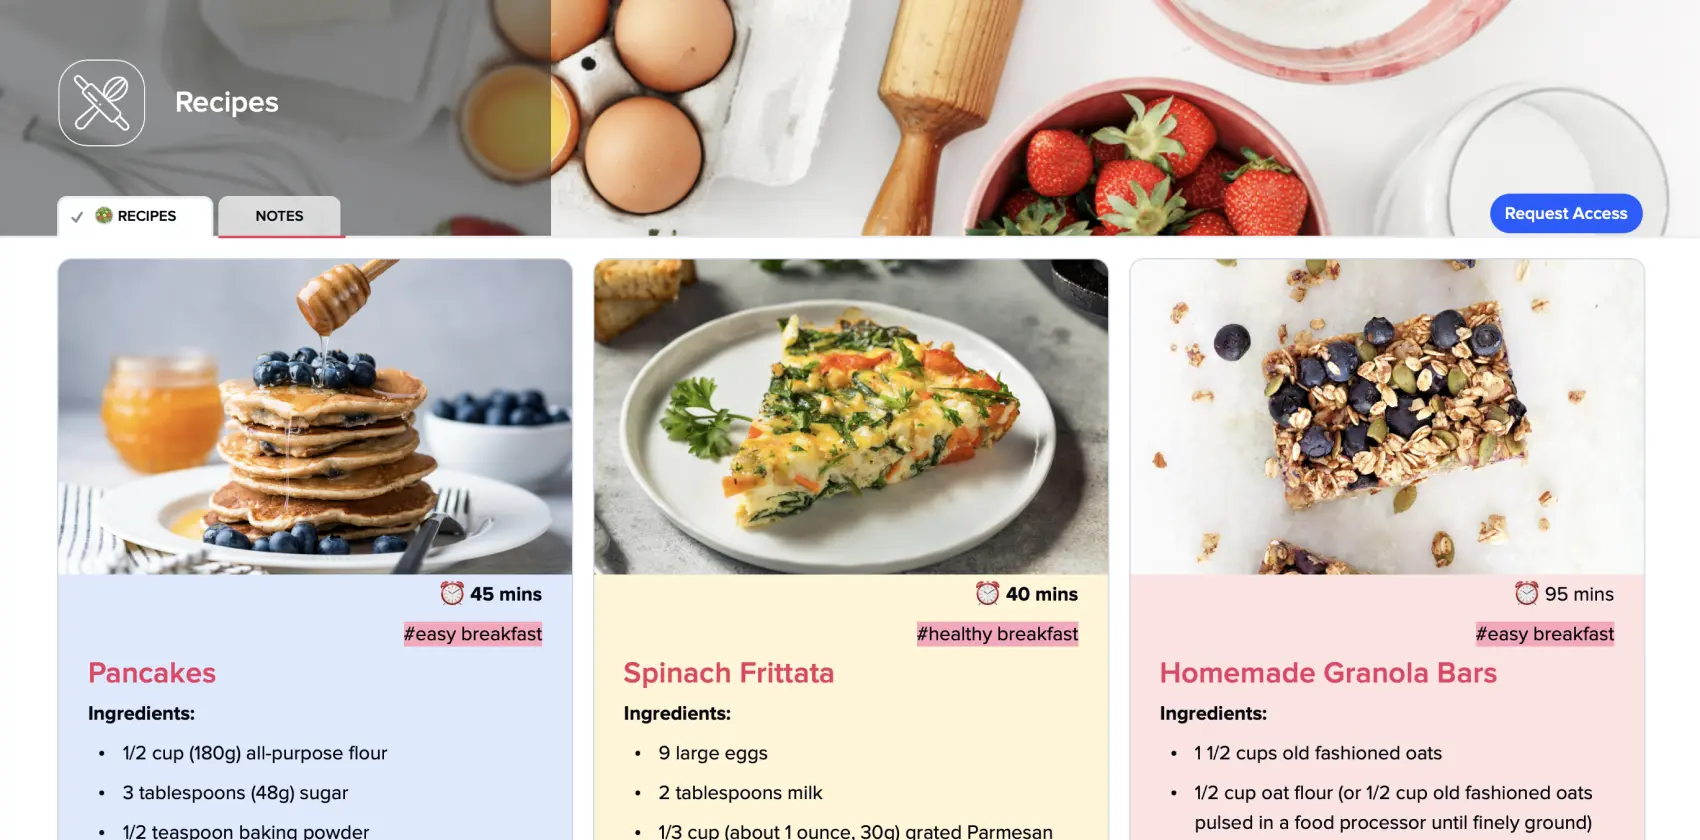
Recipe book
Reading List
Reading list template
A reading list template is a convenient tool for creating your reading list, keeping track of your reading journey, saving something interesting to check later, building exquisite taste in books, and noting your impressions.
Reading lists have become a routine for many people who read regularly or try to make it a part of their daily routine. Some prefer to keep their lists for themselves, and some use Goodreads to update their friends about their latest books and what they think about them.
A reading list is a very specific kind of to-do list. It may help you implement a new healthy habit or ruin your reading experience if created not according to your preferences and inclinations.
Many people started reading regularly during the lockdown, and once we were returned back to the world, many stopped. Reading has an incredible ability to take us from our world to millions of others. When reading, we face different experiences we would never have had in real life. In other words, reading is cool.
When do I need a reading list?
Reading lists are tools for planning your reading process. In some sense, they define your further development as a person. That’s why your approach to creating one is important.
There are many cases where you can benefit from creating and using one.
1. Studying
A detailed reading list will help you stick to your studying routine, guiding you through the information and topics you need to learn step-by-step.
2. Healthy leisure
A reading list will provide you with the activity for your free time.
3. Developing a new habit
A reading list will help you stick to your goal and read book after book with pleasure. Also, when building one, you dive into the subject deeper and find many interesting facts and new information. Creating your list is already useful, not to mention how much you will get when you finish the last book on it.
4. If reading books is your job
Book bloggers read and review books for a living. That’s why for them, it’s super serious and has to be well-organized and thoroughly planned to keep their audience’s attention and gain new viewers / readers / listeners.
Online reading lists
More and more people give up on their paper notebooks every day. And more and more people start noting and making reading lists because now they can do it on the run easily, quickly, and with as many edits as they want without spoiling the visuality using their smartphones or laptops.
However, many apps or extensions have at least one big disadvantage. For example, reading lists for iPhone or Chrome reading lists are suitable for surfing the internet and collecting articles and interesting blogs. But for your books, you will need something else.
xTiles resolves that issue by syncing the desktop version and the app. Additionally, we also offer you to use the xTiles Web Clipper to save every piece of information that might be interesting or worth reading later.
Another phase of reading list evolution is free reading list templates, where you collect and sort your books or articles.
Popular reading lists
The internet today is full of famous people’s reading lists. Using one as a base for yourself may be indeed alluring as you won’t need to research books alone. Everything was done before. The only thing left for you is the most pleasant one – reading.
However, you need to be particularly careful when choosing one because it may not match your taste in books. And forcing yourself to go through books you don’t really like only because it’s a Rory Gilmore reading list or Bill Gates reading list might make you hate reading or at least make it less pleasant for you, which might be very dangerous if it’s not your regular practice.
Creating your own reading list based on suggestions of famous people who have great taste in books, in your opinion, or simply seem nice, interesting, or intriguing is much safer and likely to bring you better results.
How to use popular reading lists?
If you’ve decided to read books from, let’s say, Lex Fridman’s reading list or Elon Musk’s reading list, start with carefully reviewing each of them. Some may be far from what you like or expect to get.
It’s important to understand that reading is not about achievements and checkmarks. You don’t have to waste your time reading a book you don’t like. Put it aside and start something else.
That’s why it’s advisable to adjust pre-made lists according to your expectations and what you want at the moment.
Also, if the reading list you want to give a try is about an immortal classic, you need to be particularly careful. Some pieces might be so out of context today that you might be shocked.
How to create an effective reading list using a free xTiles reading list template?
Once you answer a couple of questions about why you need this reading list and what goal you want to achieve by reading every book on it, creating one will be much easier.
Above, we described four main cases when a person might need a reading list. Let’s stick to that and look at important aspects and some tips for each.
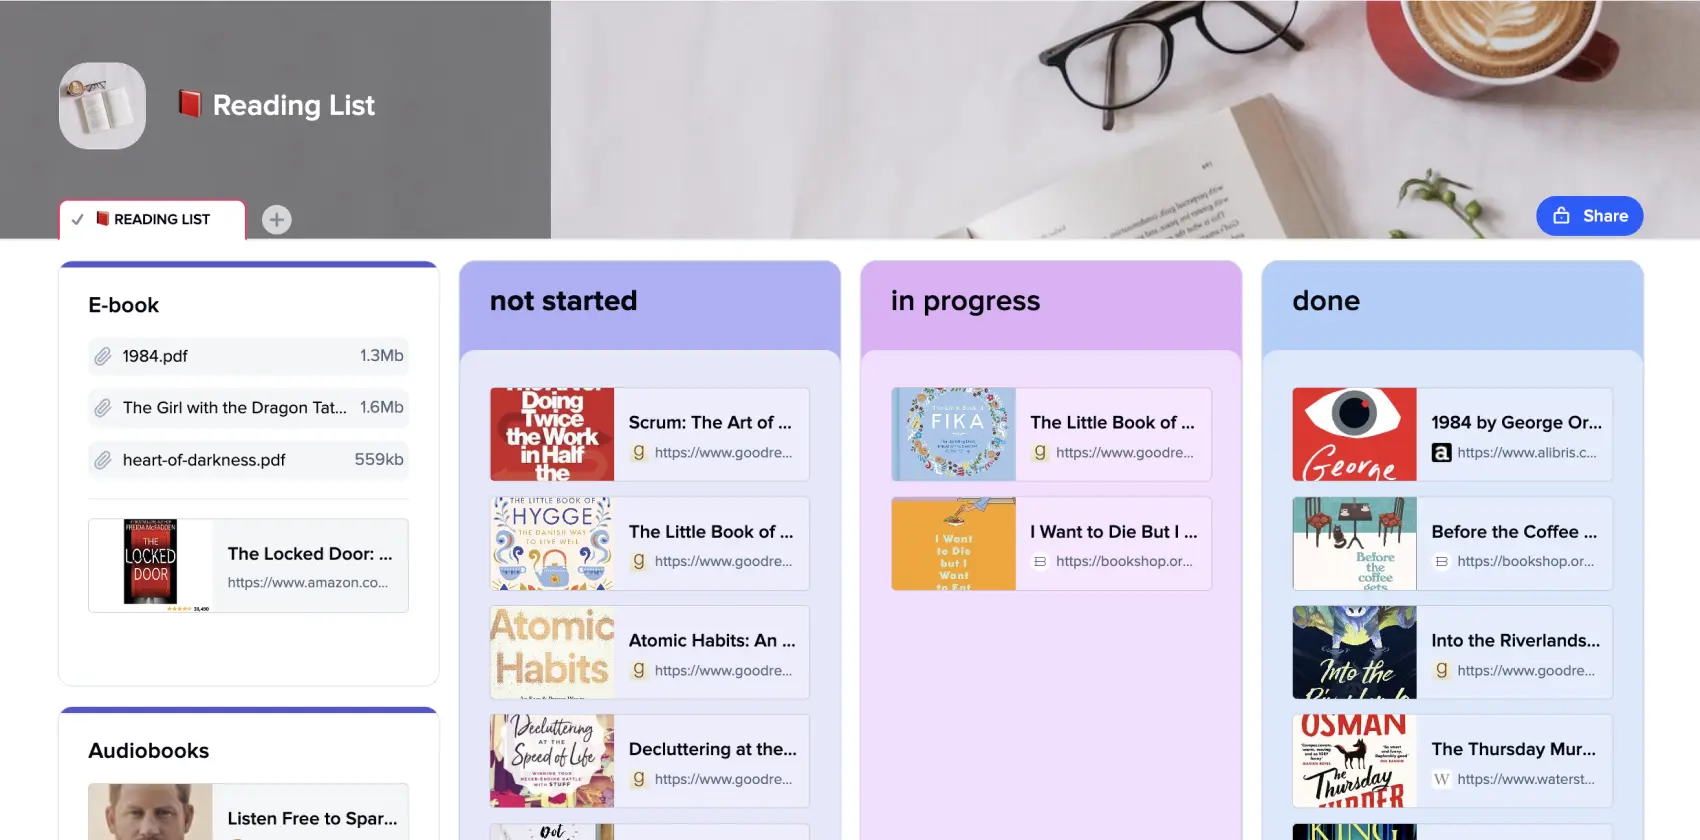
The technical part is similar for all purposes. You add books you want to read to the column “not started”, when you start reading one of them, you drag-and-drop it to the column “in progress”, and when you finish reading, you move it to the “done”.
However, the reading process might be harder than that. That’s why you may create another section for books that had turned out to be too complicated for now and you decided to postpone reading them.
The xTiles reading template is easy-adjustable, so you may have as many categories as you prefer. For example, you may divide poetry from prose or nonfiction from fiction. Or, if you’re more in context, you may have different documents for pieces from different periods of literature.
Also, before adding books you plan on reading to your list, think of how long this list will be relevant. A month? A year? Or maybe you’re preparing your summer reading list?
How to create a reading list for studying using the xTiles reading template?
Sometimes you get an already created and structured reading list from your teacher. However, if you study independently, there will be no source to get one. Also, if you’re a teacher, creating different reading lists may be a part of your work routine.
The xTiles reading list templates offer a structure where you collect all the books you plan on reading and keep track of your progress and how many of your planned books you have finished. If you’re a teacher, you may share the same documents with your students and check how well they are doing.
Uploading your files and adding links allows you to keep your planned books in the same place handy. Also, it will ease the reading process for your students if you provide them with all the needed sources. You simply cut off their escape route so they couldn’t say they didn’t read something because they couldn’t find it 🙃.
It may help if you prioritize units on your studying reading list in case you don’t have enough time to go through all of them. In this case, you still will miss something, but at least it will be less important.
How to create a reading list to plan your leisure activities using the xTiles reading template
If reading is your usual activity when you have nothing else to do or that is your way to relax, your reading list is more likely endless. You constantly add some new books you heard about recently from your favorite booktuber. Your “not started” column constantly competes with the “done” column for which one is longer.
In this case, you need a reading list to keep everything organized and ensure that you have a variety of interesting and engaging books to read in your free time. You may also add a section for “want to read” or “suggestions”.
However, if you want to make things clear, you may divide your endless book wish list into sections, smaller reading lists, and go through them each at a time or jump between them.
We don’t recommend setting goals or making schedules if reading is a pleasure for you because they may ruin everything, and the process, once well-loved, might become something you avoid.
Some people like to compete with themselves. The growing number of their reading list “done” section makes them happy. Reading counts book lists are more about form than content, but it doesn’t matter until they make you a happy reader.
How to create a reading list to make reading one of your habits using the xTiles reading template?
Many people stopped loving reading in school, where they were forced to go over boring stuff. That’s why parents are responsible for giving their kids books that will catch their attention. If you’re a reader and want your child to be one, you may prepare a reading list with books you liked when you were little. Additionally, it will help deepen the connection between you two.
So, start with researching what you’re interested in. If you have read no more than three books in your life and haven’t liked any of them, then at least you know where not to go now.
You may try an option that always works – classic literature. Don’t know any names or titles? No worries. Classic literature reading lists are quite popular. Reputable journals like The New York Times and Le Monde have their own lists of classics everyone should read in their life.
The more you read, the more you learn what you like. So, adding new ones will be much easier after ten books. Thankfully, there are dozens, and sometimes thousands, of reviews on almost every book to help you decide.
When you only work on starting to read regularly, it’s better not to put yourself under pressure. Don’t like this book? That’s okay. Just start another one. Do you feel like you’re reading too slowly? It just seems so. You’re doing great.
Most of the time, reading is about comfort and pleasure, but some books can really hurt or devastate, and not because they were written badly (this is another kind of readers’ pain you will discover after some time). So, don’t be afraid if you come across such a book.
How to create a reading list if you’re a book blogger using the xTiles reading template?
A chaotic reading list or no reading list is a skeleton in a book blogger’s closet. However, it’s not rare because there’s too much on their mind except for planning and tracking their recently read books.
People who read and review books for a living need ready-to-use reading list templates even more than anyone else. Such a template will help them work on their content to publish it regularly.
Start by taking down all books you want to read. That pile of books near your bed probably should go first. However, prioritizing depends on your preferences and your audience. If you interact with them to know what they want to learn next, you will avoid the torment of choice.
It’s important to update your reading list according to recently published books to provide your audience with relevant content.
However, a reading list template won’t be enough to plan your content uploading effectively. You may try our other templates to get the best results.
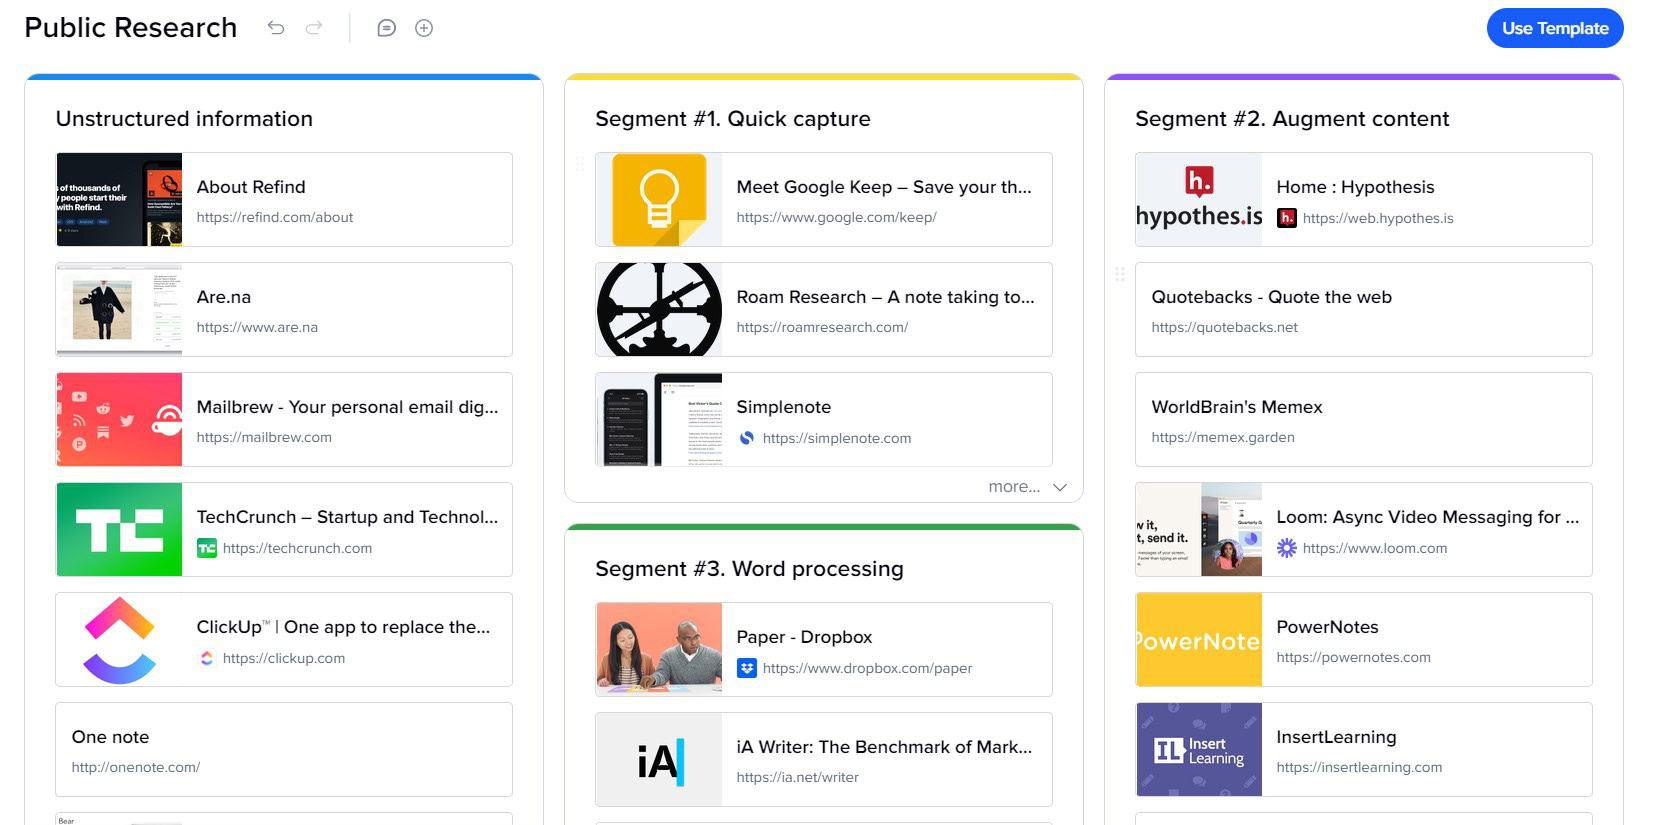
Public Research
Project Management
Project Management Plan Template
Whether it’s software development, large marketing campaigns, or small interior design renovations, project management is essential for delivering a great product on time, especially when multiple projects are being developed simultaneously. However, no matter how hard a manager tries, or how consistent the team is in maintaining communication and staying aligned, there might be instances where something gets missed or overlooked.
Project management templates come to the rescue by helping teams start their projects on a solid foundation, execute them effectively, and finish them on time. These templates may seem like a lot for a single document, but when tailored to the project’s specifications, with the team’s abilities and expertise in mind, they become powerful tools for reaching success.
The xTiles Project Management Plan Template is a ready-to-use framework that provides a blueprint for your project, regardless of its specifications or the industry you’re in.
What is a project management plan?
A project management plan is a formal and approved document created by a project manager, incorporating inputs from the project team and key stakeholders. Its purpose is to define how the project will be executed, monitored, and controlled.
The plan can take the form of either a concise overview or a detailed document, encompassing baselines, subsidiary management plans, and other relevant planning materials. Its primary objective is to guide the project team in achieving the project’s intended scope within the defined parameters.
Throughout the project’s execution, performance is measured against the performance measurement baseline outlined in the project management plan. Any deviations from these baselines are promptly addressed by the project manager, who makes necessary adjustments to correct the course. If these adjustments prove ineffective in rectifying the deviations, formal change requests to the baselines are initiated.
The project manager invests significant effort in ensuring that the baselines are attained, ensuring that the project sponsor and the organization can fully benefit from the project. Beyond proficient planning skills, a successful project manager excels in effectively controlling the project’s progress, ensuring the timely delivery of project deliverables, and adhering to the provisions outlined in the Project Management Plan.
Why Use a Project Management Plan?
A project management plan helps teams gain a comprehensive understanding of the project and guides its successful execution. Successful projects require attention to many aspects, such as manpower, resources, risk management, communication, and talent. A plan aligns all these factors, ensuring smooth execution. Here are the essential reasons why incorporating project management plans is crucial for successful projects and teams:
- A project management plan provides a clear and comprehensive outline of the project’s goals, timelines, and benefits, ensuring all stakeholders are fully engaged and supportive of the project’s objectives.
- It helps identify the specific tasks and activities required to complete the project successfully.
- It helps determine the right expertise and skills needed to develop the project, maximizing the chances of accomplishing project goals efficiently and effectively.
- It enables meticulous evaluation of potential risks that may arise throughout the project’s execution.
- It ensures effective communication within the team, critical for project success.
- It helps set clear and achievable goals and milestones.
- It ensures efficient management of financial resources, raw materials, manpower, and other assets.
How to create a project plan using the xTiles Project Management Plan Template?
A project plan may be for different kinds of projects. Whether you’re looking for project management in healthcare, project management marketing, or project management for freelancers, you may go for a pre-designed template to save time.
Utilizing the xTiles Project Management Template and a detailed step-by-step guide ensures you create a comprehensive plan highly useful for the team, stakeholders, and everyone involved.
Step 1: Prepare for Planning
Some think that planning is the first stage of any project. However, in order to be effective, planning needs to have an envisioned base. In other words, a project manager needs to discuss with the client and the team all the aspects of the project.
- Gather the information:
Gather together all the information you already have about the upcoming project. This section is very important because it helps to identify from the first glance your current project. Later, when you have more information, add everything that may be necessary.
Also, don’t forget to record your resources and everything you need for successful project development. Put together links and files that you and the team need for inspiration, your competitors and what you like about their projects, and any kind of files and notes to ensure people involved understand where to move.
Even before diving into a detailed brainstorming session, take the necessary steps to envision your plan.
- Try to understand the problem and envision it from different angles:
Take the time to understand the problem you’re aiming to solve with your project. Analyze its various aspects and implications to gain a comprehensive perspective. However, remember that it’s always better to focus on one specific problem than trying to save the world with your project.
- Generate diverse ideas:
However, during the brainstorming session, encourage the generation of a wide range of ideas. Don’t restrain people’s imagination and accept even the wildest ideas. You and the team will consider them later to choose what will work best, what may work, and what probably won’t work in any circumstance.
Encourage your team to think outside the box and aim high. Embracing bold ideas can spark innovation and lead to breakthrough solutions. Remember, it’s easier to scale back a daring concept than to transform a safe idea into something extraordinary.
Also, during brainstorming sessions, it’s always good to explore different approaches and solutions as they can address various scenarios related to the problem from different perspectives and help the team generate more ideas.
You may make your meeting notes in the xTiles Project Management Plan Template to have everything at hand at any stage of your project.
- Discuss and vote:
After every idea is carefully written down, allocate time for team discussions to evaluate and assess the proposed solutions. You may take a break for a couple of days, so everyone can think of these ideas and decide how they feel about them. Usually, straight after the brainstorming sessions, people’s minds might be overwhelmed with the amount of what they heard and saw.
It’s important to encourage open dialogue within the team and everyone involved in the brainstorming and allow team members to voice their opinions and insights.
Try not to accentuate who came up with certain ideas during the discussion to avoid confusion and disagreement. You may use a voting system to prioritize ideas and determine which ones should be explored further in a democratic way so that everyone feels responsible and involved, even if the chosen idea isn’t theirs.
- Visualize and align:
Create visual representations of the chosen ideas to enhance understanding and alignment within the team and everyone involved. Make sure everyone understands the idea.
The visualization may include diagrams, charts, sketches, or any other type of content to depict the proposed solutions and their potential impact in the most representative way.
When working on this part of the project, imagine that you need to explain your idea to someone who hasn’t attended your brainstorming session. That’s why it has to be clear, eliminating the possibility of misunderstanding.
Step 2: Plan and Prioritize
Once you have the idea or ideas for the project and you have gathered early feedback, the time to prioritize and plan your project effectively starts.
- Incorporate feedback:
Take into account the feedback received from early testing, discussions, or stakeholders. Every thought is important, and sometimes it’s better to spend extra time getting feedback than rush into action and then realize that something was wrong from the beginning.
Analyze all the feedback you managed to get carefully, considering the success metrics and objectives of your project. Use this information to prioritize what features, tasks, or components should be included in the project.
- Establish priorities and build a roadmap:
Now it’s time to prioritize your tasks to allocate resources and focus on the most critical aspects of the project. You may use the Time Matrix to ensure nothing distracts you and the team from the important tasks.
Determine the order in which the identified elements should be addressed. Consider their importance, impact, and feasibility.
Create a roadmap that outlines the sequence of activities and their interrelationships. This will provide a visual representation of the project’s timeline and enable effective planning and coordination.
- Share and update:
Share the project plan and roadmap with the relevant stakeholders and team members. Ensure everyone has access to the necessary information to stay informed and contribute effectively.
Regularly update the project’s plan and dashboard to reflect any changes, progress, or new insights.
Using the xTiles Project Management Plan Template allows you to make changes quickly and update everyone on them.
Step 3: Execute and Stay on Track
After you’re done with planning your project, you can start executing it. This stage is incredibly important as it is where all the key decisions are made. However, tracking your progress, analyzing it, discussing it with the team, and reviewing intermediate results will help you go through this stage smoothly.
It’s necessary to execute the tasks outlined in the plan while constantly maintaining a focus on the project’s objectives, and that’s where a project management plan template will seamlessly help.
Here are the steps you need to follow in order to successfully deliver the product:
- Initiate execution:
With your plan in place, begin implementing the project. Assign roles and responsibilities to team members, ensuring clear accountability. You can do it right in your xTiles Project Management Plan, and the assignees will get notifications about their tasks.
- Maintain consistency:
To ensure successful delivery, it’s crucial to stay on track throughout the project. Regularly monitor progress, track milestones, and review performance against the established plan. Identify and address any deviations or obstacles promptly to maintain consistency and momentum.
- Decision-making structure:
Establish a clear decision-making structure within the project team. Define who will have the authority to streamline the decision-making process and ensure that decisions align with the project’s scope and goals.
- Project oversight:
Maintain open lines of communication and regular check-ins to monitor the overall progress and health of the project. This includes reviewing key metrics, addressing potential risks or issues, and making adjustments as needed.
Remember that good and refreshing ideas may emerge at any stage of the project.
Keep stakeholders informed and engaged to ensure their continued support throughout the project.
Step 4: Deliver Your Business Strategy Update
Congratulations! It’s time to ship your project and share the progress and outcomes with relevant stakeholders. Follow these steps to effectively deliver your business strategy update:
- Prepare for reporting:
Gather all the necessary data, metrics, and insights to report on the progress and outcomes of your project. If you were consistent with making changes, this part is almost done and may need only a few finishing touches.
Ensure that you have a clear understanding of the key achievements, results, and impact that you want to communicate.
- Craft the update:
Create a concise and engaging update that highlights the important milestones, accomplishments, and key insights from the project. Use visuals, such as charts or graphs, to present the data effectively and make it easier for stakeholders to understand.
- Update statuses:
Change the status of tasks, milestones, or project components to “DONE” or a similar indication of completion. This step not only provides closure but also helps in tracking and organizing future projects.
Step 5: Improve Your Project Plan
When the project is finished, you need to reflect on the experience to learn from. That’s how you ensure growth in the team and improve your own ability to execute projects.
- Evaluate lessons learned:
Reflect on what went well, what could have been better, and the lessons learned throughout the project with your team. Encourage everyone to share their experience and insights freely to prevent similar issues in the future.
Discuss the challenges you encountered during the project and identify the best practices that helped overcome them.
- Capture lessons:
Document the valuable lessons learned from the project. Record them in a centralized location where everyone can easily access them. Include details about the challenges faced, the solutions implemented, and the outcomes achieved. This documentation serves as a valuable resource for future reference and learning.
- Share with peers:
Share the lessons learned with your peers and colleagues. This can be done through presentations, reports, or team meetings. By sharing your experiences and insights, you contribute to a culture of knowledge sharing and help others avoid similar pitfalls or leverage successful strategies.
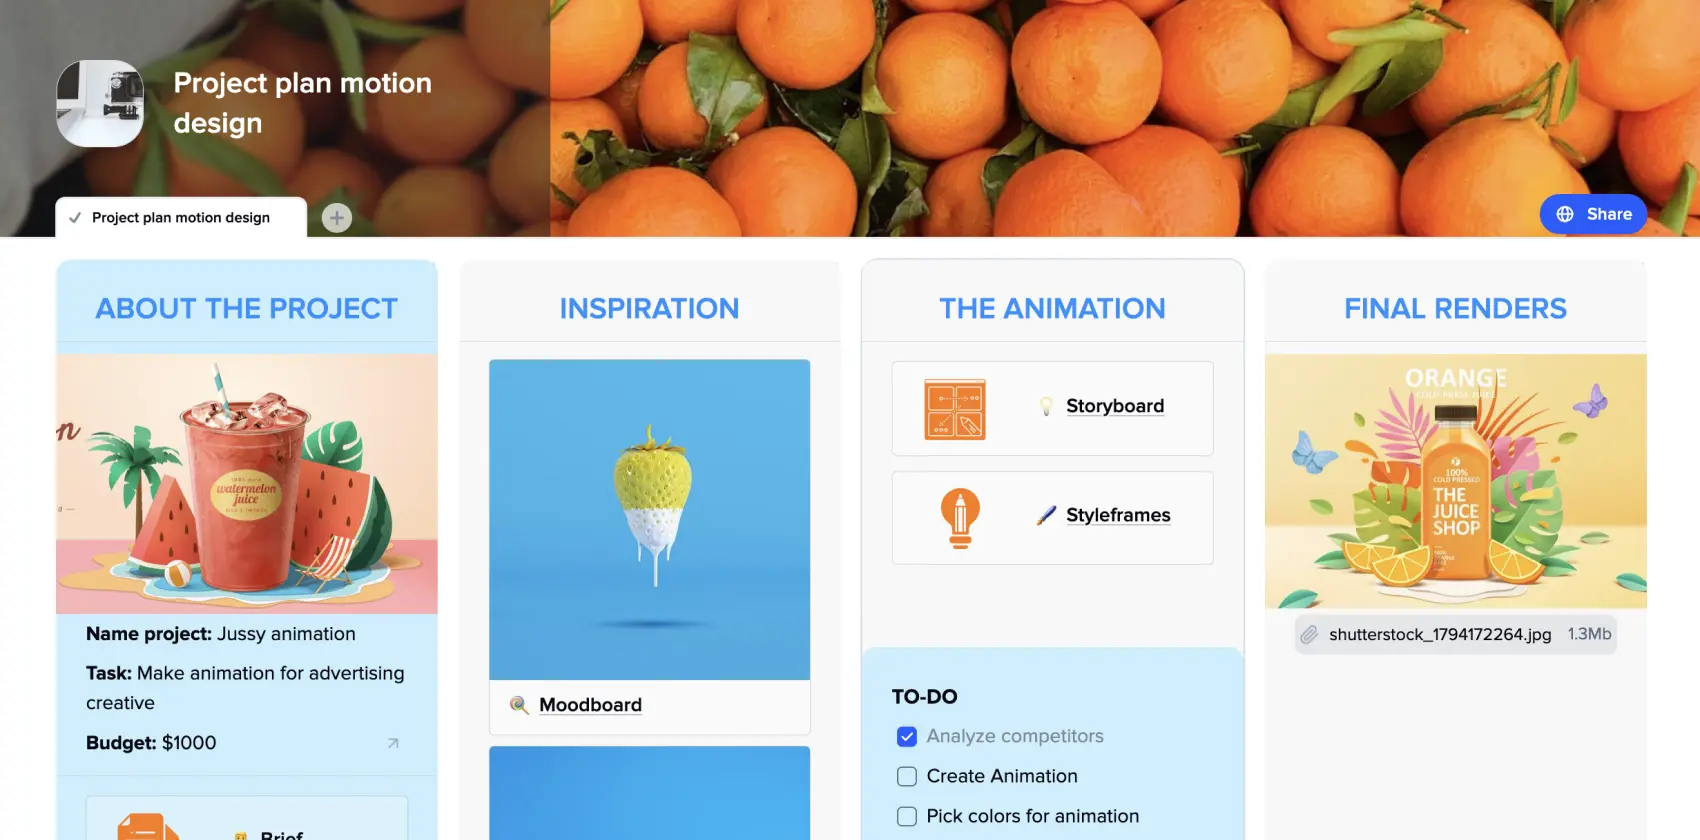
Project plan motion design
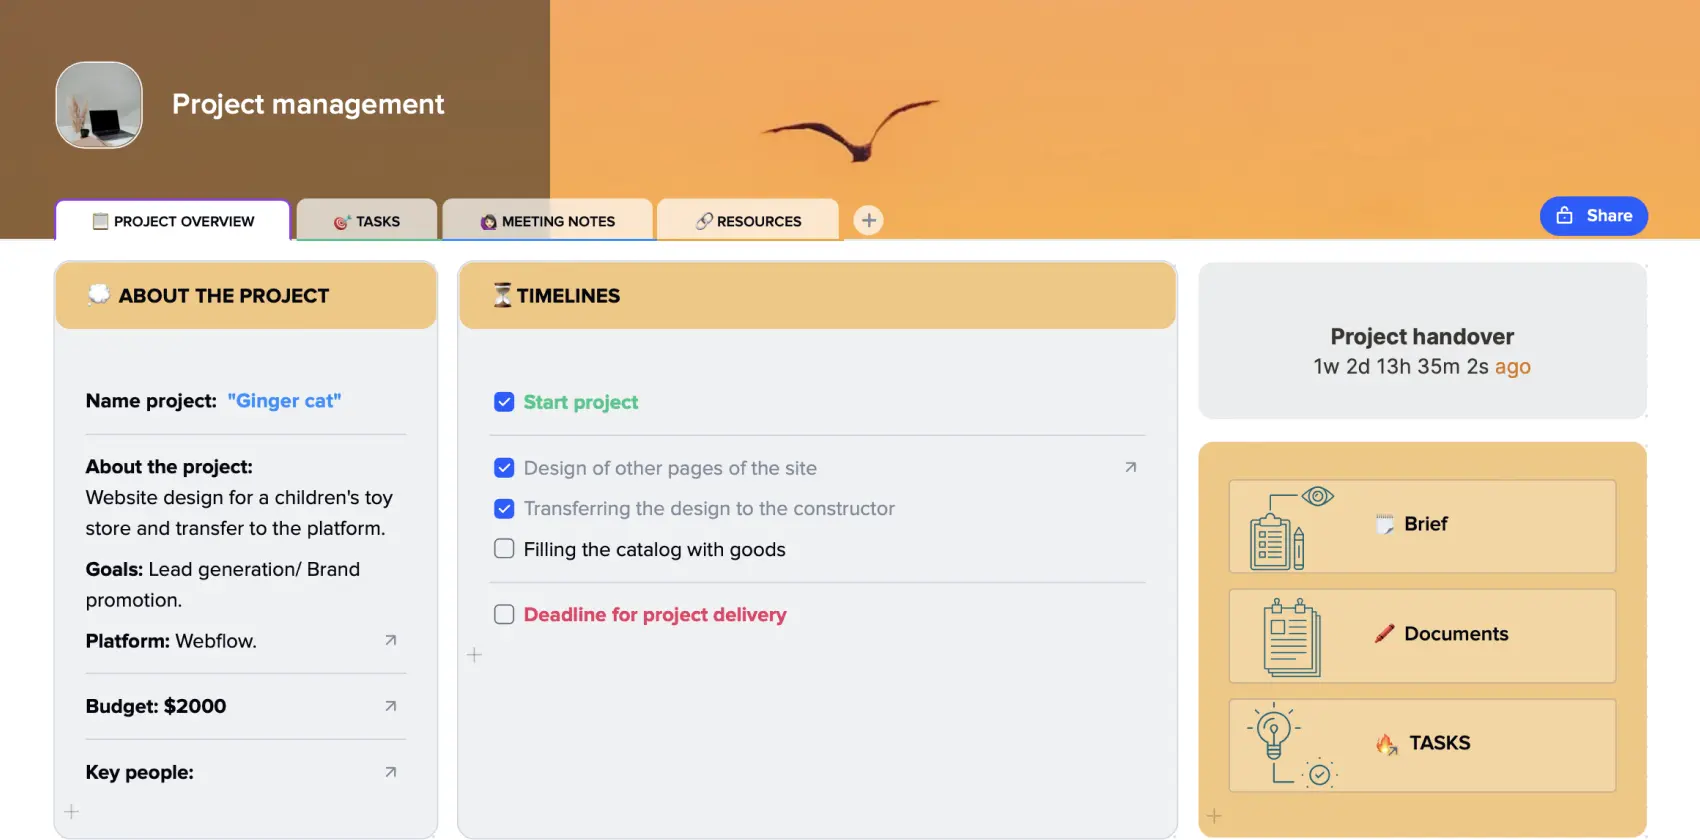
Project Overview
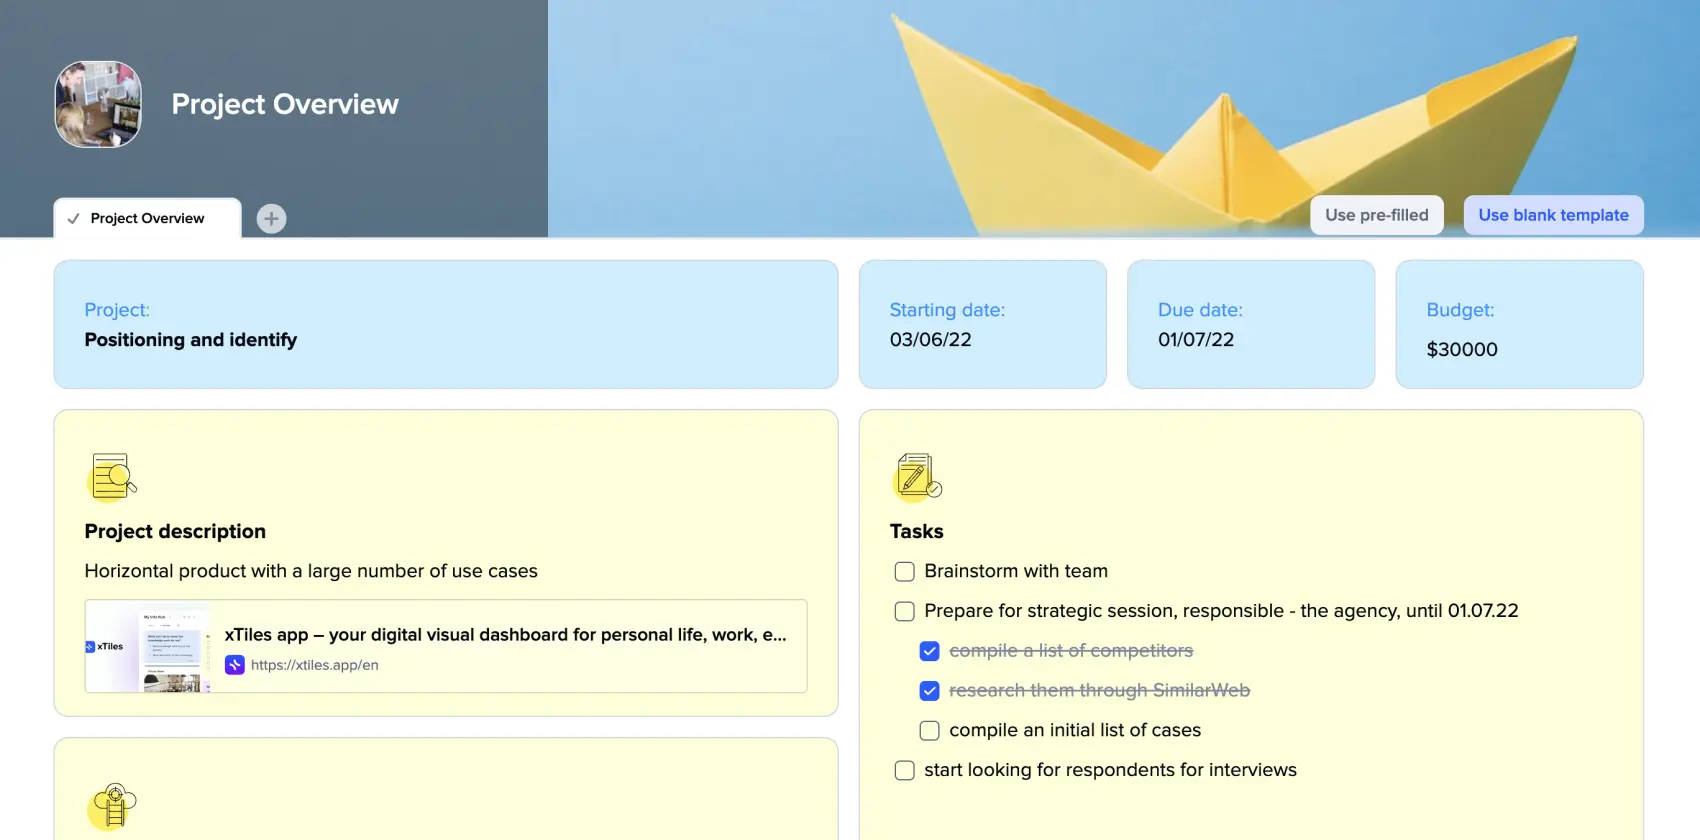
Project Overview Template
He who owns the information owns the world. In project management, who owns the information leads successful projects, establishes a healthy work environment inside a team, and delivers products on time.
The project overview is a tool to monitor how your project is going, its key metrics, milestones, challenges it faces, etc. It is a starting point for effective decision-making for a manager.
A project overview template is a shortcut to easy and successful tracking projects, especially if there are a couple of them being developed simultaneously. Being a pre-designed framework, the template allows managers, team members, and stakeholders to keep track of up-to-date data about projects current status.
The xTiles Project Overview Template is a ready-to-use template for a wide variety of cases and projects with various customization options, the ability to share with anyone on the internet, and quick access from mobile devices while on the run.
Additionally, we offer you a project overview example and a brief yet comprehensive guide on how to create your own statement.
What is a project overview?
A project overview statement serves as a concise and informative document that outlines the key elements of a project. It includes a brief but comprehensive description of the project, its purpose, objectives, and anticipated outcomes.
That document’s main purpose is to ensure that everyone involved has a shared understanding of the project’s fundamentals before detailed planning can be started and nothing gets missed.
Similar to a Project Charter or Project Brief, the project overview statement plays a crucial role in garnering support and paving the way for the project’s progression into the execution phase.
Produced during the initiation stage, it serves as a high-level summary of the project’s scope and aims to align all involved parties. It helps teams and managers easily encompass and showcase the following key elements of a project:
Project purpose: Clearly articulates the underlying reason and motivation for undertaking the project.
- Project purpose
It clearly articulates the underlying reason and motivation for undertaking the project.
- Business need
It identifies the specific business problem or opportunity that the project aims to address or leverage.
- Objectives
It clearly defines goals and desired outcomes that the project seeks to achieve within a specified timeframe.
- Budget and resources required
Outlines the estimated financial resources required for the successful implementation of the project. Also, identifies the necessary personnel, equipment, materials, or other resources essential for project success.
- Risks and issues
It highlights potential risks, challenges, and known issues that the team might face while implementing the project.
- Expected results
It provides an overview of the anticipated deliverables, outcomes, or benefits that will be realized upon successful project completion.
It is advisable to keep the project management overview limited to a single page or a couple of slides. This brevity encourages clarity and precision, allowing the document to convey essential information concisely. By adhering to this page restriction, the overview statement remains an accessible and easily digestible reference for stakeholders.
Project overview benefits
Many people wonder why a project overview is essential when it’s easier and faster to communicate the needed information verbally. However, documenting projects from the initial idea to their completion is important for people involved, managers who establish workflow, and stakeholders who need to see what is going on.
Apart from regulatory compliance, a project overview offers numerous benefits to all parties involved:
- A project overview helps to maintain focus
It keeps the team, manager, and stakeholders focused on what is truly important, saving them from excessive details or losing sight of the project’s objectives.
- It enables risk management
It allows managers to identify and estimate potential risks and plan strategies to address them effectively.
- It helps to prevent mistakes
By outlining high-level tasks and their interdependencies, the overview helps prevent errors and misunderstandings.
- It establishes expectations
It sets the tone for the entire project, establishing clear expectations for your team.
- It facilitates communication
It eases the communication between everyone involved and especially those who are not directly involved in the project’s day-to-day operations.
- It promotes alignment
By providing a clear direction and outlining desired outcomes, the project overview ensures that everyone involved understands and works towards the same goals.
Project overview template
A project overview template is a pre-designed structure or format that provides a framework for creating project overview statements. Consider it a starting point for easy and efficient organization and presentation of your project key information.
It offers numerous benefits to those who have previous experience in writing project overviews and those who have never done anything like this before.
- A ready-to-go project overview template ensures the consistency of your document. By offering a standardized format, the template makes it easier to understand and compare different sections or pages.
- It saves time and effort, eliminating the need to create an overview statement from scratch every time. It allows project managers to focus on what is important, the content and details, rather than the document’s layout.
- A template ensures that no important point is overlooked. That’s why it’s important to use only well-designed and well-structured templates or those that enable easy editing and customization.
- It also helps to maintain clarity and consistency throughout the whole document, improving readability and comprehension. The template guides project managers in organizing their thoughts and ensures that the project overview statement is structured in a coherent and easy-to-follow manner.
- It helps project managers communicate effectively with stakeholders, as they provide a structured format that conveys information concisely and accurately.
- Using templates built on industry best practices or proven project management methodologies, project managers can ensure that their overview statements adhere to established standards, improving the quality and effectiveness of communication and decision-making.
- It is flexible and easy to customize. Users can choose between using a standardized structure or customizing the template according to their project specifications.
How to write a project overview effectively using the xTiles Project Overview Template?
A project manager must create a compelling project overview statement that captures the project’s essence and secures necessary approvals at the initial stage. That’s how misunderstandings and ambiguities at later stages can be at least minimized.
Clarity and conciseness are key for any project overview. When writing yours, avoid excessive fluff and prioritize conveying essential project details efficiently. The skill to tell everything about your project with a one-page document comes with time and practice. However, a project overview template will help you start and save time.
Here are the tips to help you write a successful overview:
- Keep your project overview concise
Since you have limited space, you need to focus on using it effectively. You need to summarize the project’s key aspects efficiently, considering every detail you want to add twice.
It’s crucial to omit using excessive details or information overload. Otherwise, your potential readers might be overwhelmed, and the key points of your project might stay unnoticed among all the details you decided to provide.
It’s often helpful to start working on the overview on your own. Draft it yourself before involving the team. Collaborative input is crucial, but starting with an initial draft helps expedite the process and prevents prolonged iterations.
When working on the overview, strive to articulate every single detail using the language of your clients or users to create resonance.
Tailor your language and terminology to resonate with your intended audience. Use business-oriented terms unless your senior leadership team expects technical jargon.
- Highlight the problem or need you want to resolve by developing your product/project
Emphasize the problem or opportunity the project aims to address. This should be prominently stated at the beginning because it’s the core reason you and your team are undertaking the project in the first place.
If applicable, include a reference to the project timeline, especially if there is a fixed deadline tied to solving the problem or fulfilling the need.
If you struggle to articulate the problem, you may consult with the relevant stakeholders or your teammates to ensure everything is represented accurately.
- Project description
Tell a bit about what sets your project apart and how it intends to address the identified problem or need. Highlight the specific goals you aim to achieve through the project. However, resist the temptation to make a long list of what makes your project so special. A few of the most important or intriguing (something your competitors can’t boast of) points will be enough.
- Include project goals
Dedicate a section to outline the project goals. Keep this section brief, consisting of a couple of bullet points, just like you did with the project’s description.
Consider including project deliverables as objectives, ensuring they are measurable and specific. Yes, precision is the best friend when writing a project overview statement.
- Provide ideas
Finally, offer ideas to develop the project. There might be dozens of ideas your team produced during the brainstorming sessions. However, include only those relevant to your current project stage and have potential. Also, remember that your team has to have the resources to implement them.
You may also discuss assumptions, risks, challenges, constraints, known issues, or any other factors influencing the project’s progression from this point.
- Set tasks
Provide a list of tasks to showcase your plan. Remember that when tasks are feasible, they prove your sustainability and reliability. And tasks that can’t be accomplished with the current resources might play a cruel joke on your team even though they seem very attractive and convincing.
Also, you may define the success criteria for the project. How will you determine project success?
Align the success criteria with project requirements, ensuring that meeting the requirements signifies achieving the goals and meeting the criteria. Make the success criteria measurable for easy tracking and project closure.
- Review and iterate
Ensure that all the above sections still fit within the space of one page. Avoid reducing the font size. If space permits, add a list of project milestones and key dates without delving into a comprehensive project schedule.
Show the document to your team before seeking approval from stakeholders. Your teammates might add some improvements or see mistakes you overlooked.
- Obtain approval
Once the document is complete, use it to seek approval from the project sponsor and other key stakeholders with decision-making authority. Their endorsement is crucial to proceed with the project.
However, be ready that you might not get the approval the first time, especially if writing a project overview was a new experience.